

🤑 The portfolio that helped me earn over €50,000 (Complete guide) · The Bunker #101
🤑 The portfolio that helped me earn over €50,000 (Complete guide) · The Bunker #101
Learn how to create a high-converting portfolio with 4 essential strategies that have helped generate over €50,000 in revenue.
Hi friend 👋🏻!
Welcome to The Bunker.
A Newsletter in which we talk about UX Design and the Freelance Journey, dedicated to those who are starting out in both worlds and who feel identified.
From The Bunker, we accompany you on the way.

In today’s article, I’m going to show you the key elements for creating a portfolio that truly converts. I’ll give you 4 key tips that have helped me earn over €50,000.
I know that the topic of portfolios is something everyone talks about, and it seems like everyone knows exactly how to do things. But nobody explains things by showing results.
So, how are you supposed to believe that this is the correct way:
If you don’t show results
If you end up giving the same generic advice that everyone mentions
In fact, these are not secret techniques at all and are something that most creatives and agencies use to close as many clients as possible.
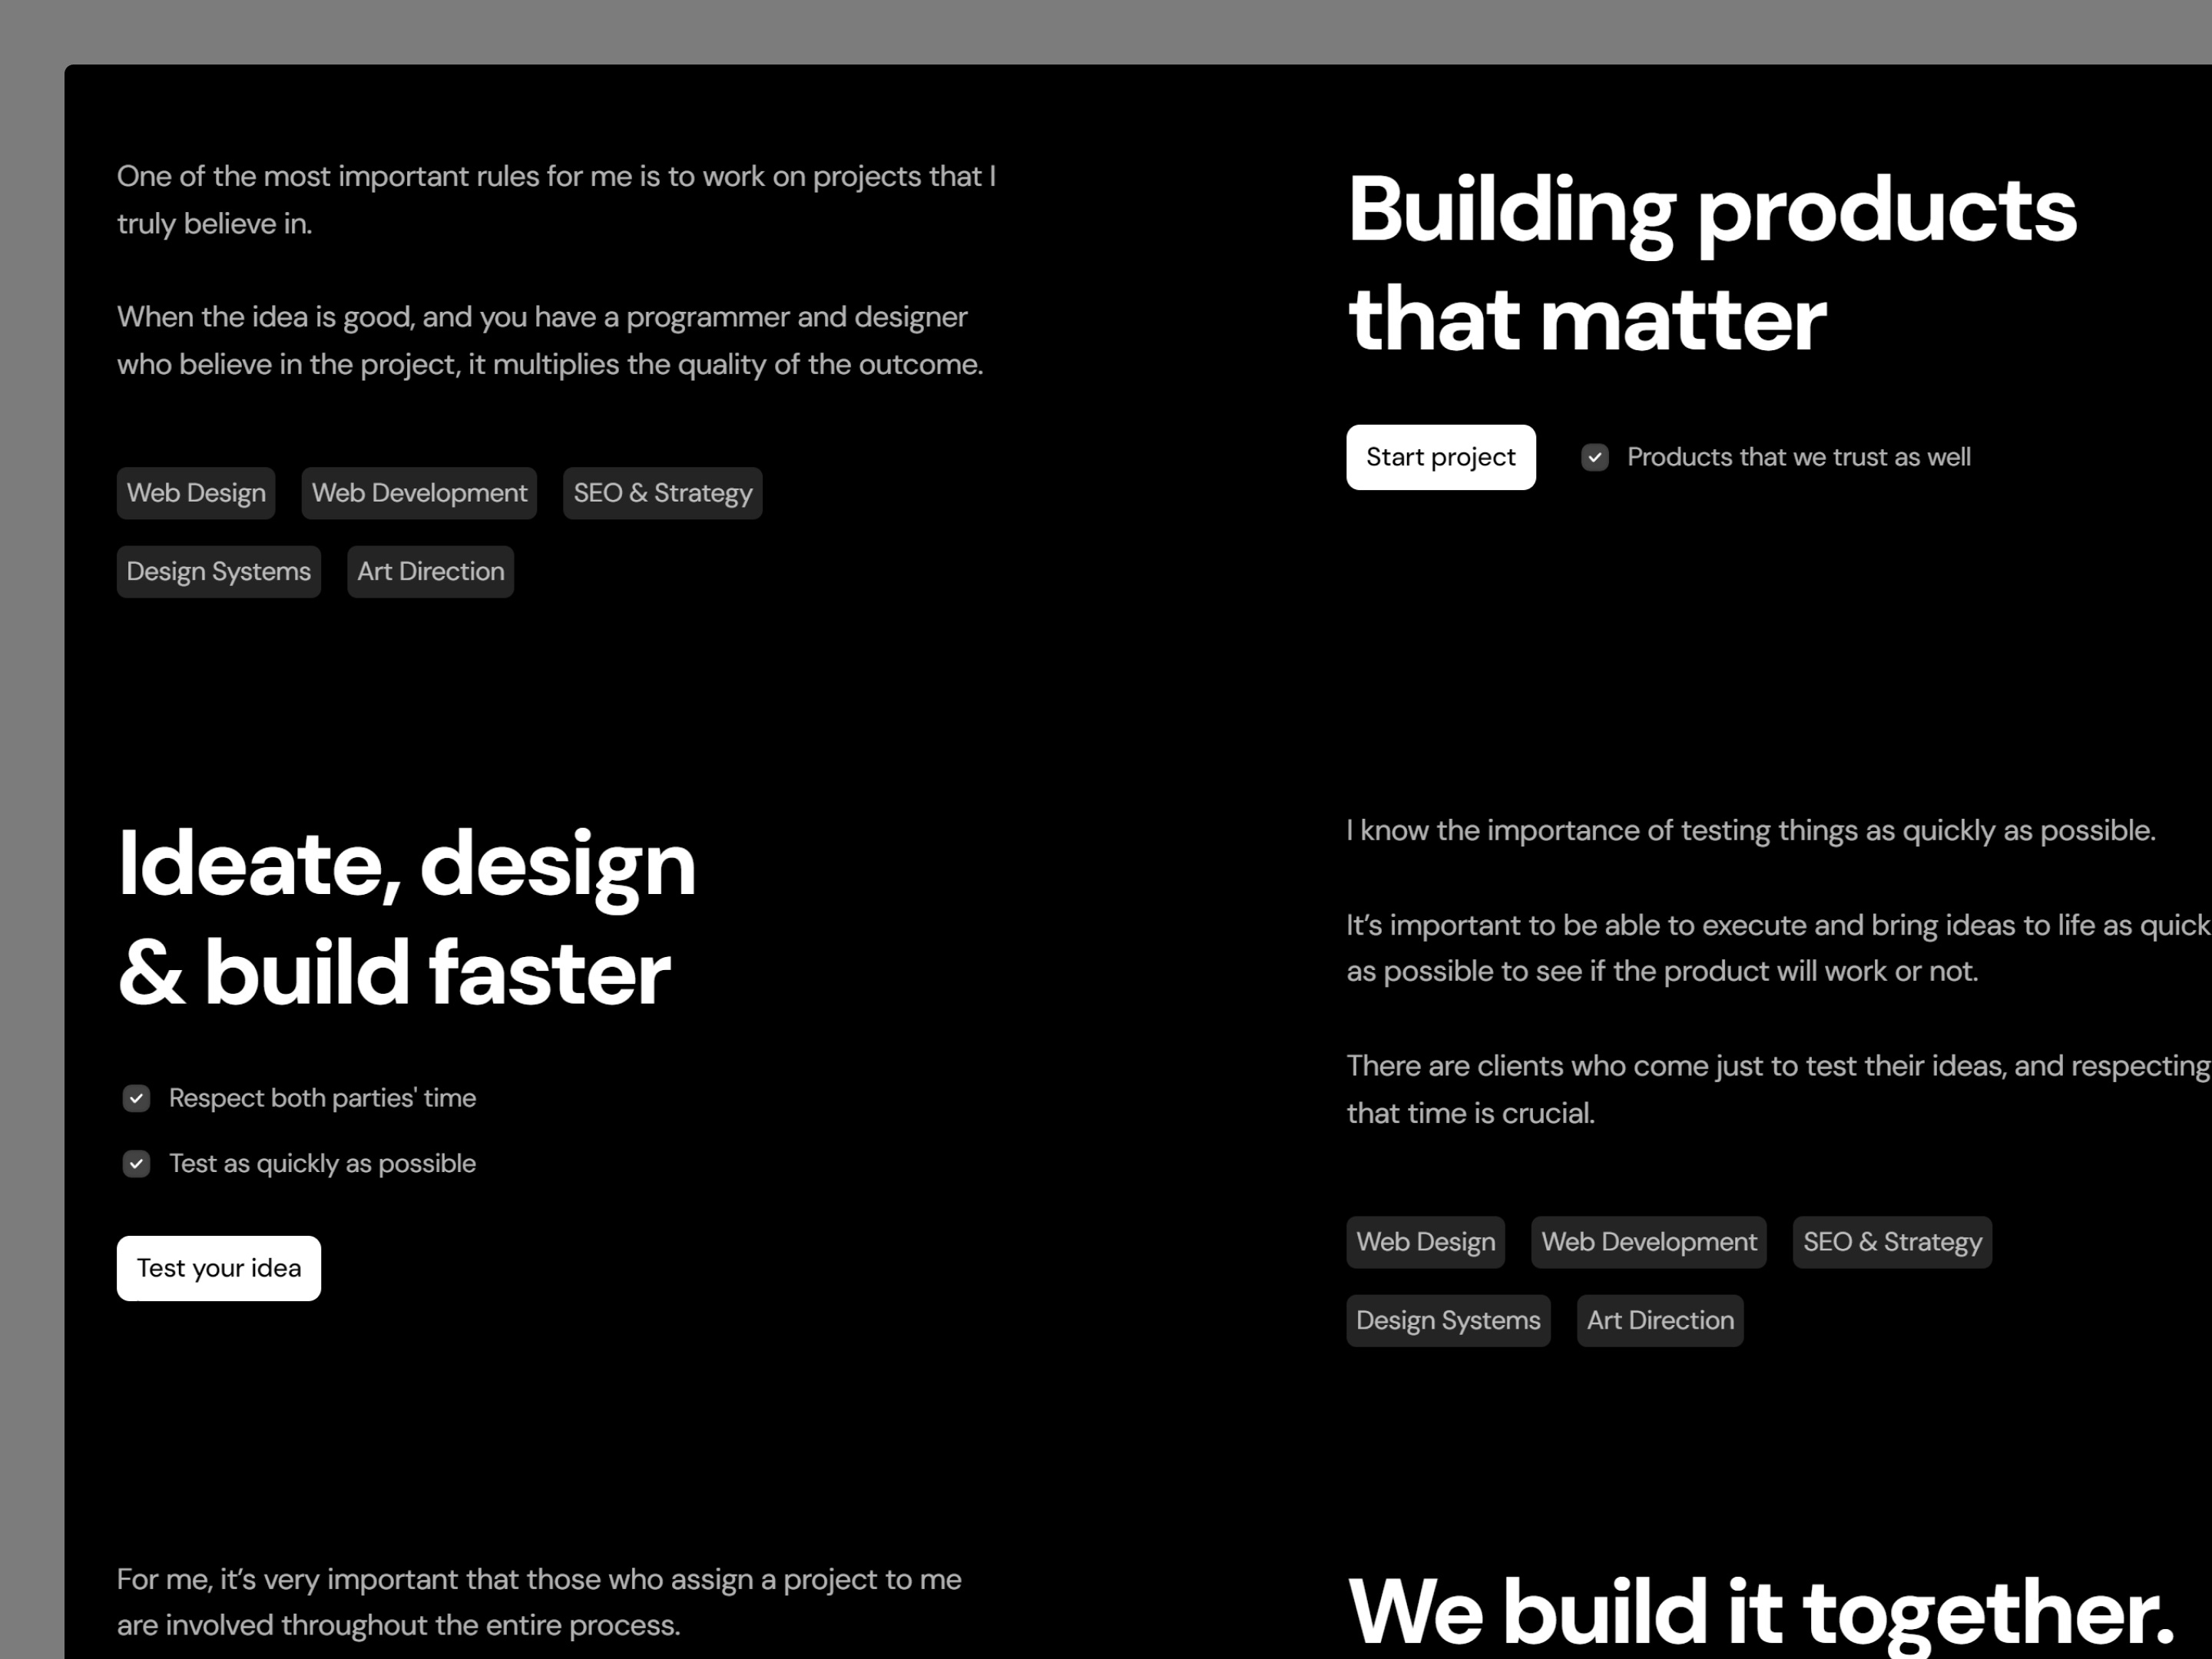
1. Strategy
First of all, this article will focus on designing your own portfolio.
That is, a website that reflects you as a professional profile that helps you convert a visitor into a client.
In other words, we’ll aim for the maximum possible conversion and effectiveness in your funnel.
This is important to keep in mind because we won’t focus on the typical nonsense; in fact, we might end up with a somewhat boring and typical structure: But functional.
We want results, right? We want it to work. We want a client to land on the website and end up hiring our services.
So our strategy will mainly be this: Maximize our click-through rate and conversion rate.
On the other hand, as part of the strategy: You should define what kind of designer you are. It’s fine to be a generalist, but try to initially lean towards one niche or another.
A graphic designer might have a slightly different type of portfolio compared to a UX/UI designer. There will be elements or pages that we’ll need to design or not.
2. Structure
Let’s start by defining what the perfect funnel for a portfolio is.
The reality is that the structure we’ll use isn’t very different from the strategy you would follow for a marketing landing page.
First:
The Hero Section
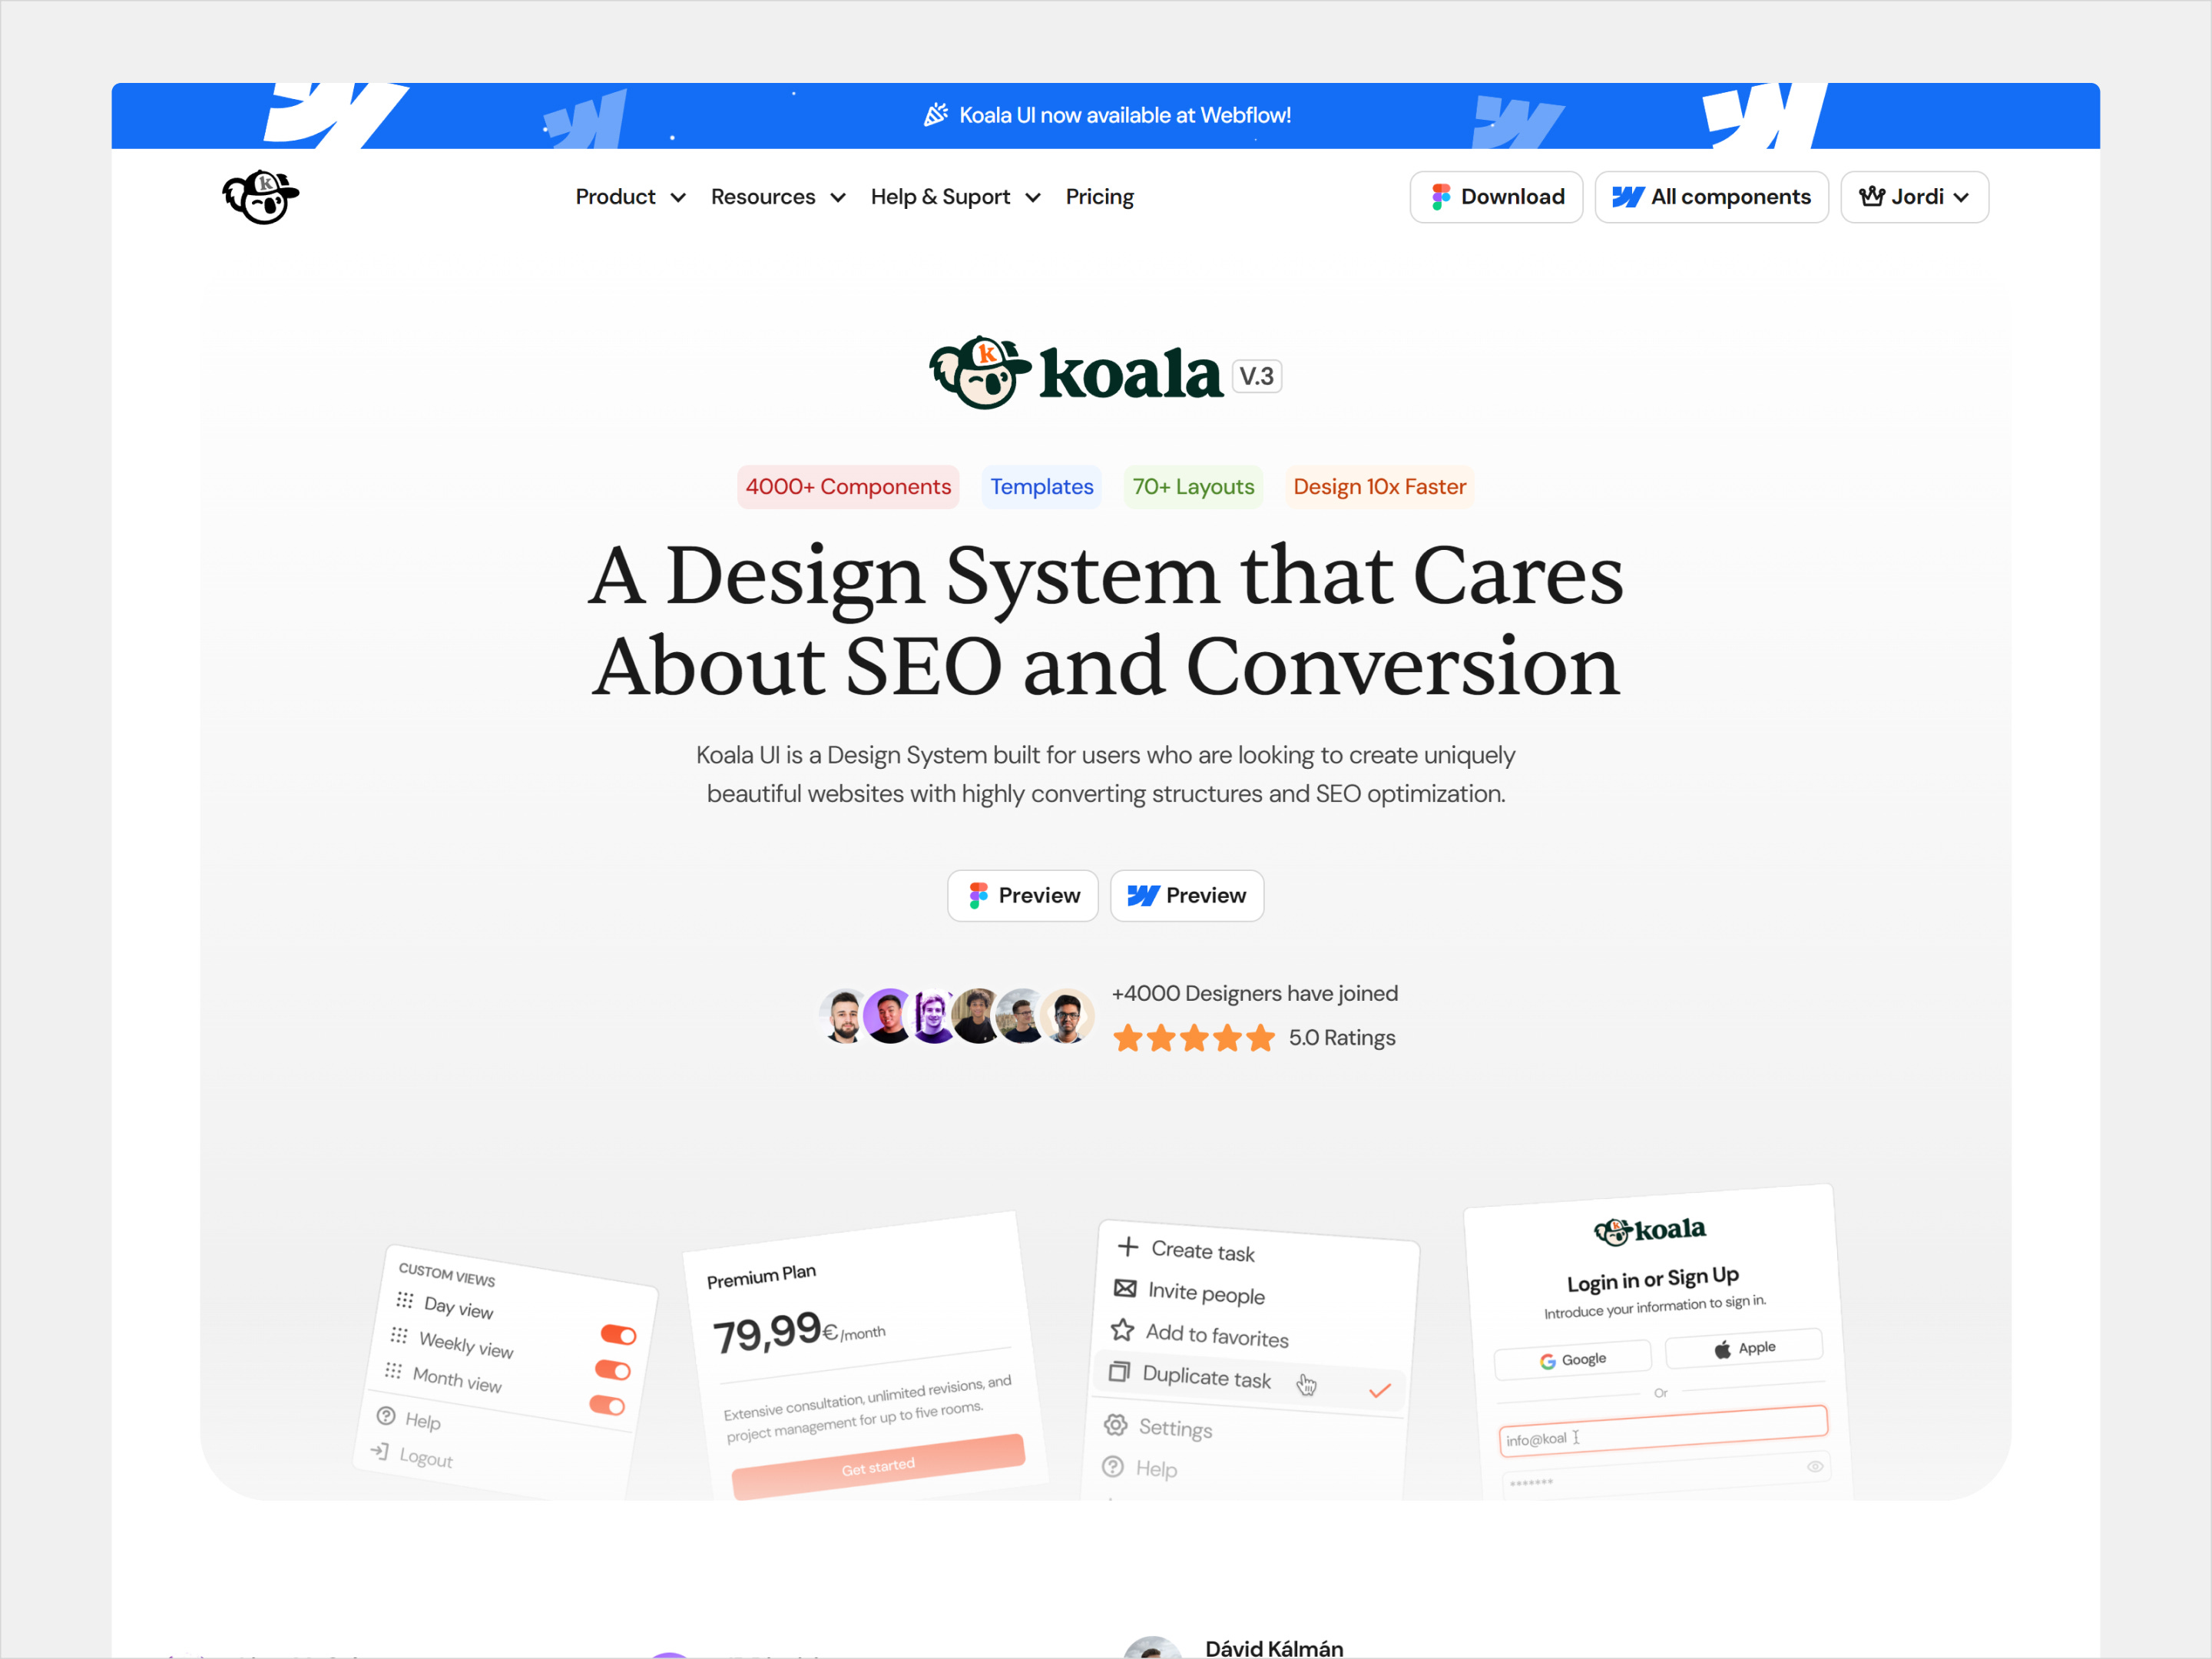
Here, it’s very important to consider these 4 elements:
Heading 1: This will be the most important of all. This title needs to hook the user; it’s likely one of the few things the user will read on your entire website.
It’s important not to be too creative but to have a distinctive touch. It needs to be clear.
For example: Don’t put → We take your websites to the next level. Put something more concrete like: Specializing in creating high-conversion SaaS products.
Subheading or Supporting Paragraph: This text will support Heading 1. You can elaborate a bit more here, but I like to treat it as a secondary Heading 1: That is, what I would also put in Heading 1. If Heading 1 says we specialize in creating high-conversion SaaS products, here I would put something like: Premium solutions based on market data to achieve maximum conversion.
Main Button: Depending on the type of product you have, you’ll use one text or another, but if we’re an agency that creates SaaS solutions, I would put something like: Get Started Now or Book a Spot.
Testimonials: Then we have the testimonials, which are probably the most important element of all because they verify that everything above is better, for 2 reasons:
If you only show their photos: You’ll demonstrate that someone has already worked with you and that what you’re saying is likely true.
If you show testimonials with text (which I recommend), you can reinforce the text with what the testimonials say. In other words, if the testimonials frequently mention: Great quality and speed, adapt your Heading 1 to be: High-quality solutions at maximum speed. So the user reads Heading 1 and instantly verifies it with the testimonials.
Testimonials
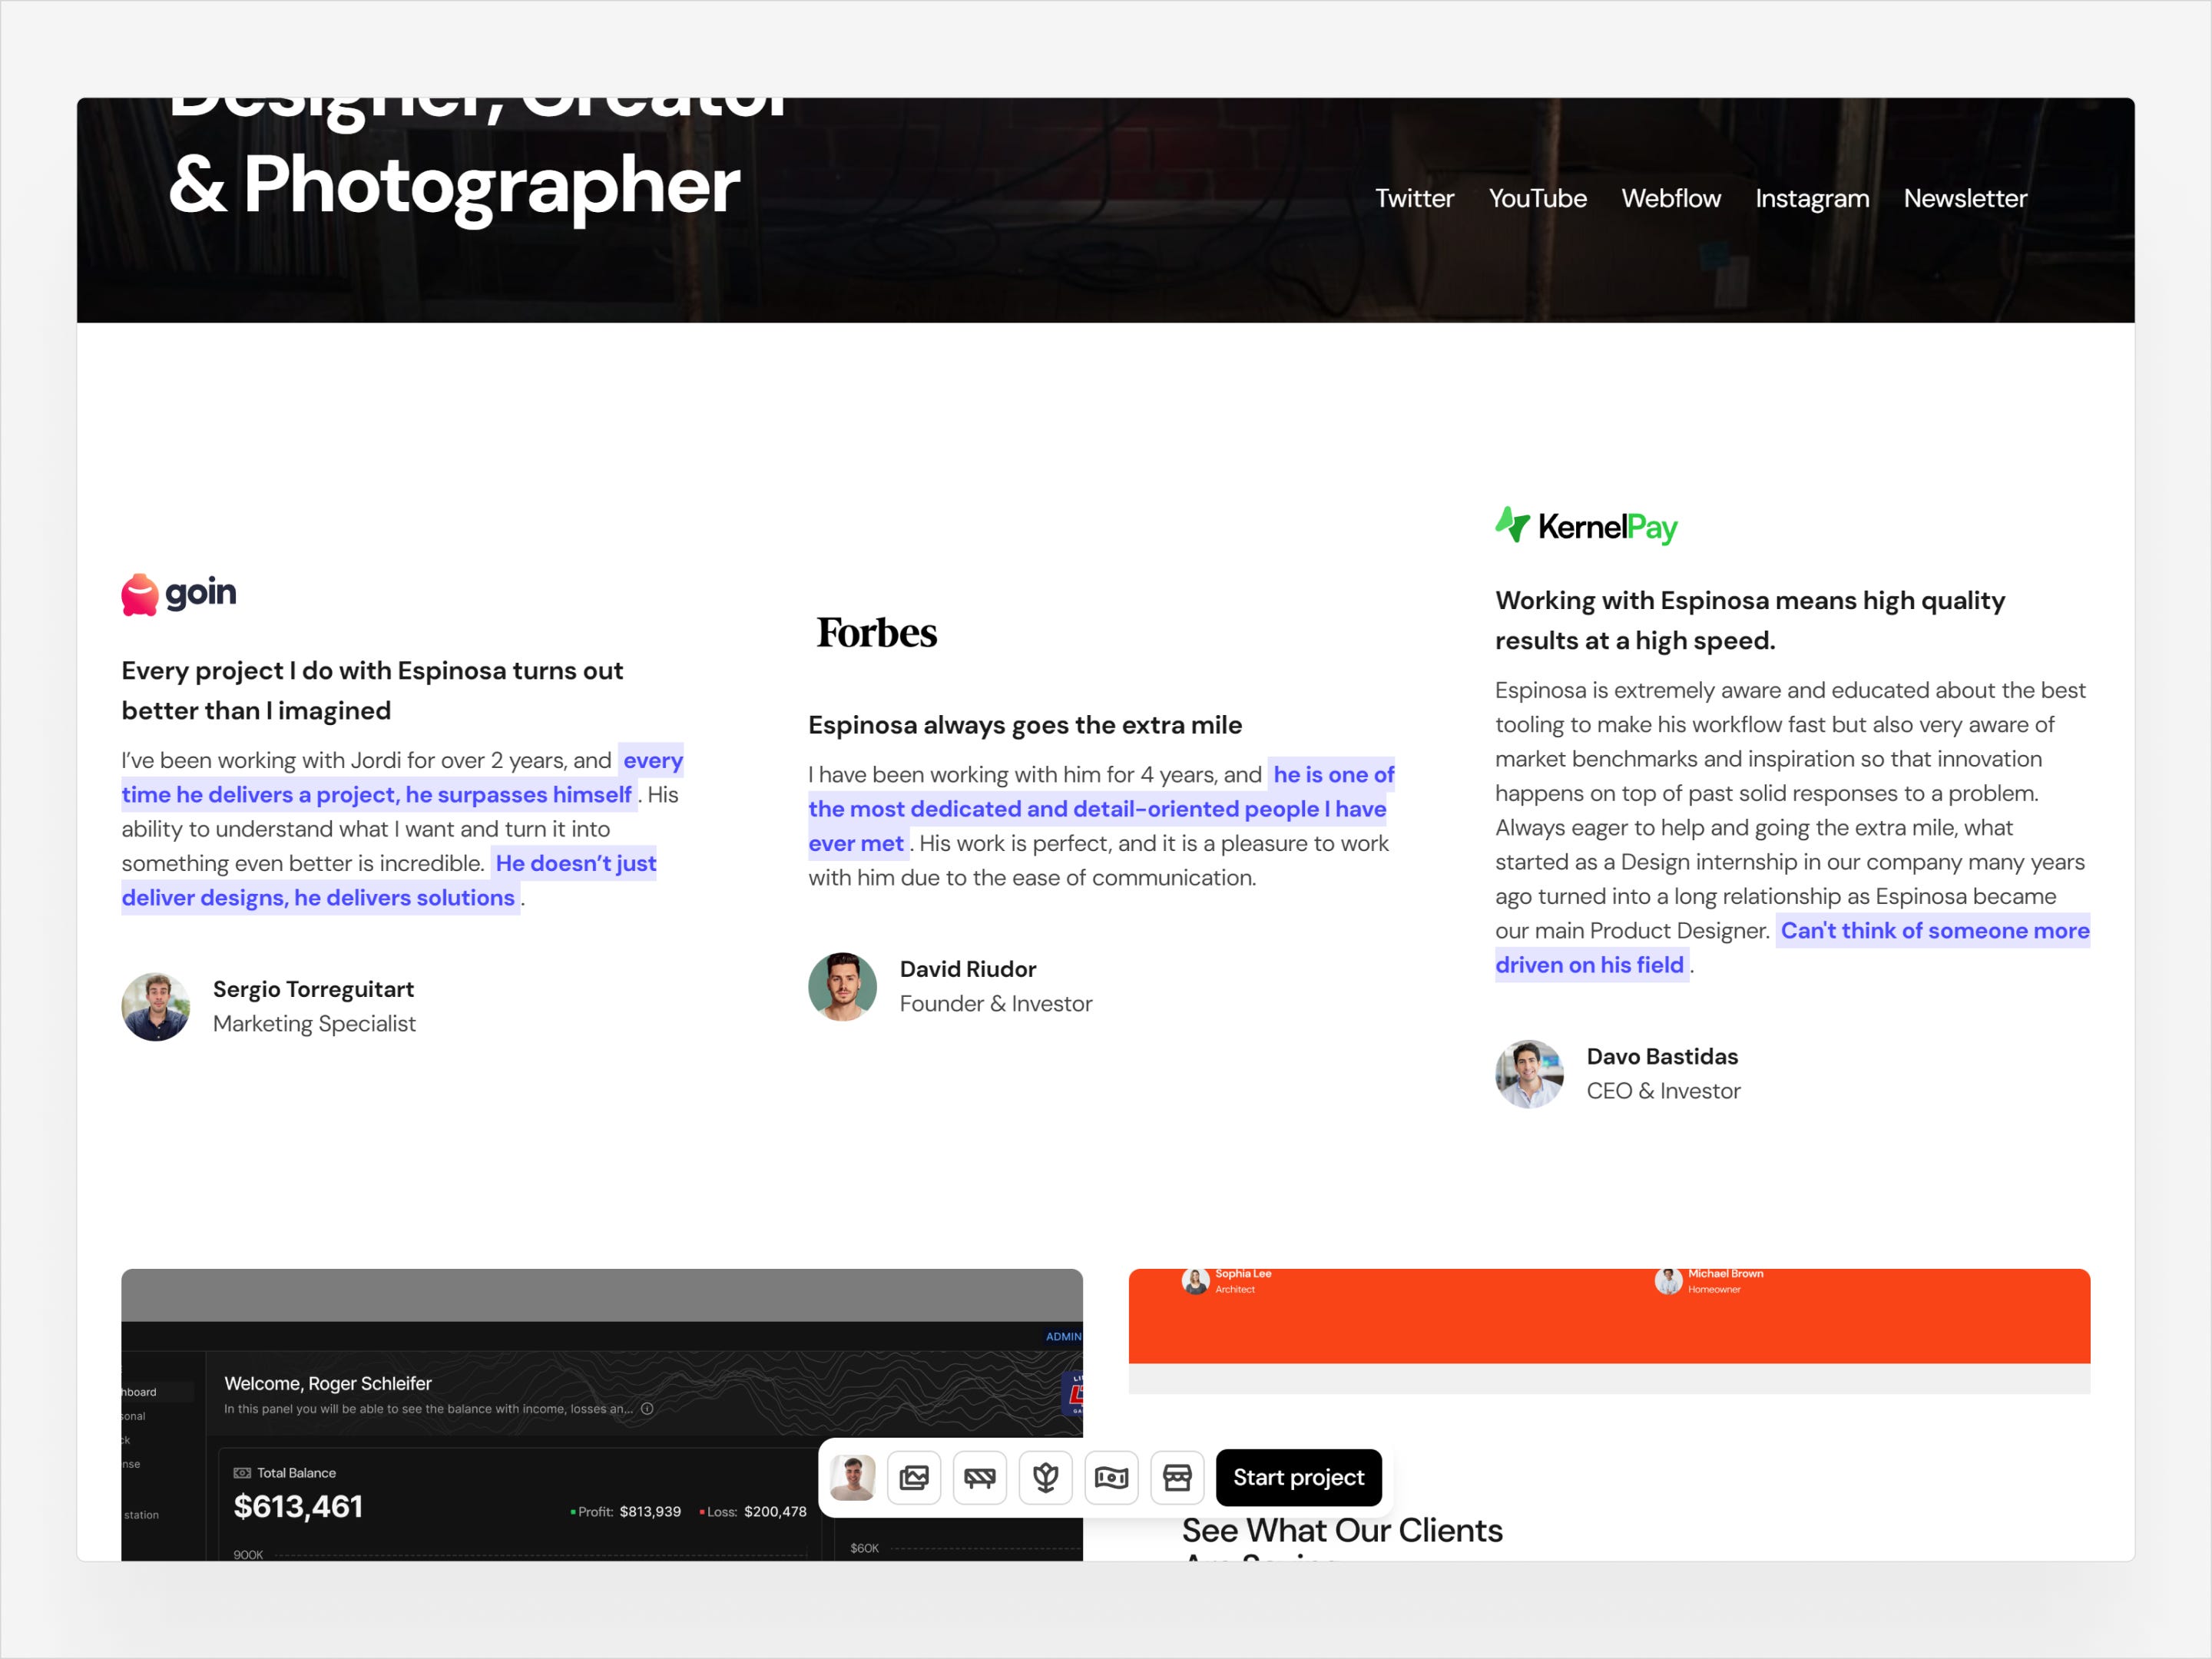
Quickly after showing the hero section, if you’ve used testimonials only with photos, you’ll now need to introduce a section dedicated solely to text testimonials.
If you’ve already used text testimonials, then it’s not necessary.
Work
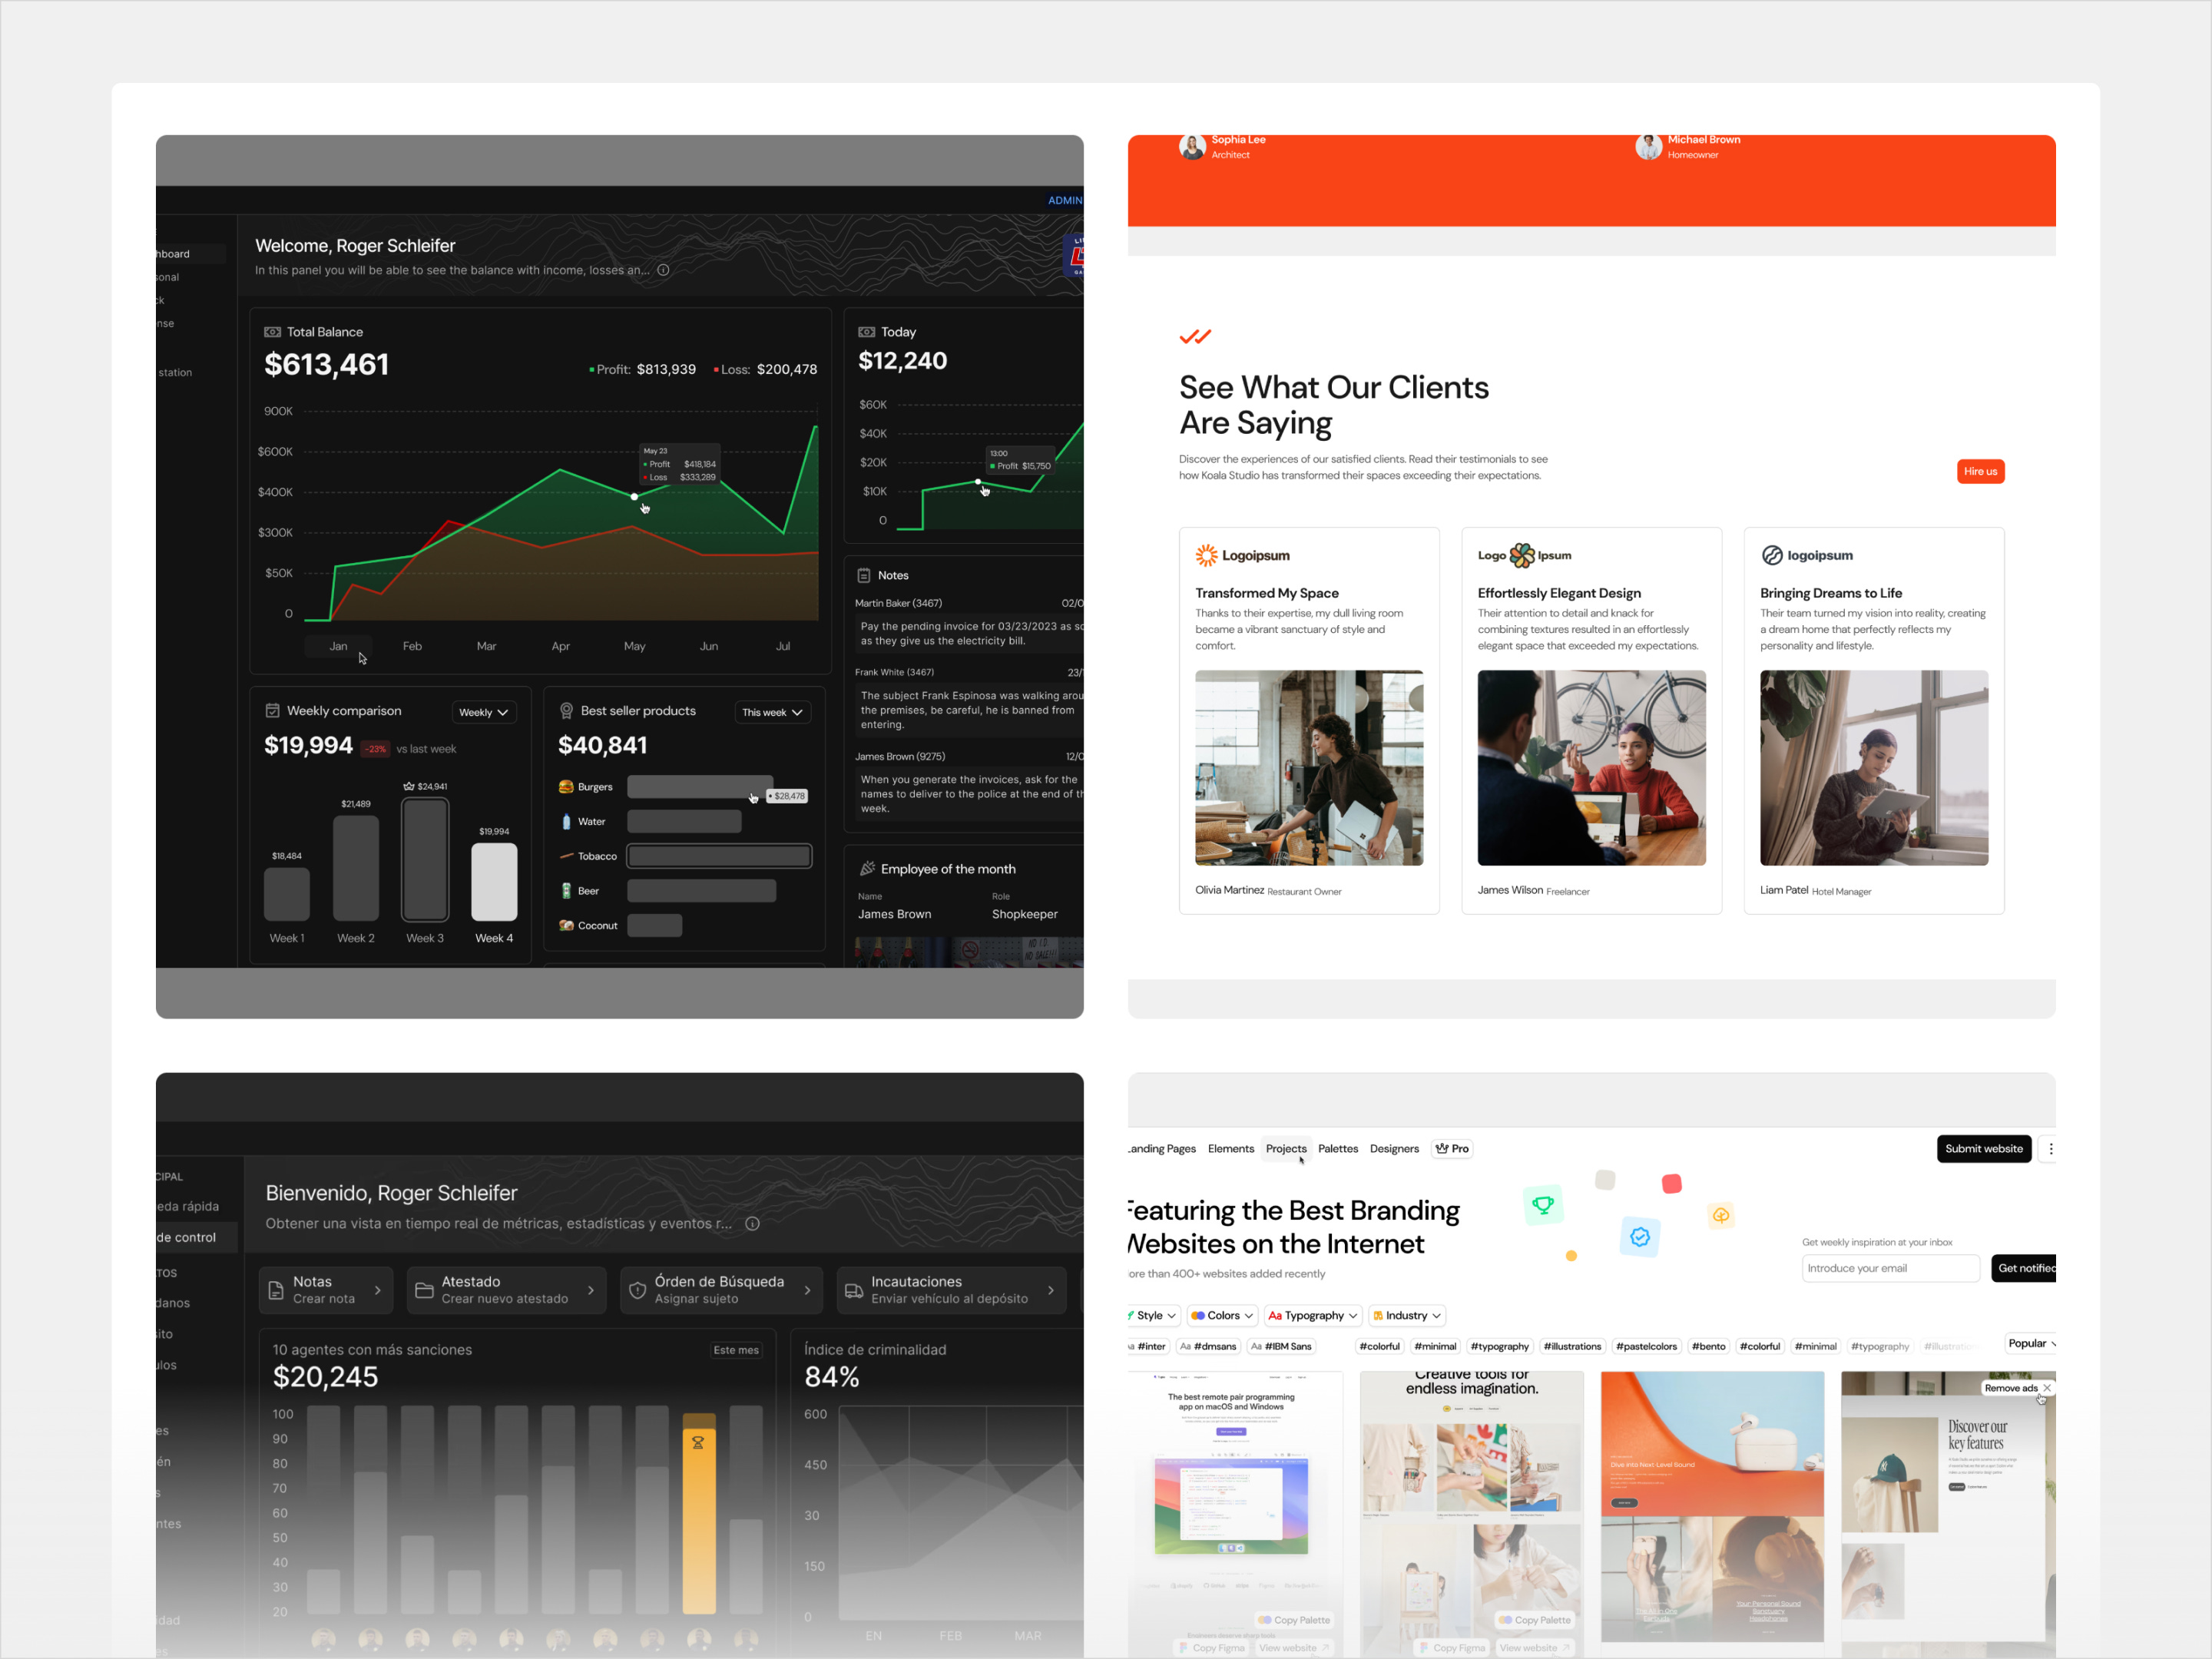
Immediately after consuming the hero section and the first testimonials, now comes the work. In the end, as designers, the most important thing and what will convince the client are your designs and problem-solving ability.
I like to introduce my work as quickly as possible.
Keywords
We could place this section higher up, but I don’t want to bore the user with endless text if they haven’t even had the chance to see my work.
First, let them see my work and once they are “convinced,” then we jump to more text.
But of course, what’s important here is to see that it’s not just any text; these are well-researched keywords meant to launch Heading 1 all the time.
If you notice: Ideate, design & build faster. Or We build it together. Lasting relationships.
These are well-researched keywords that usually get repeated often.
What clients look for:
Lasting relationships
Fast, high-quality results
Alright, let's focus on that direction.
More Work
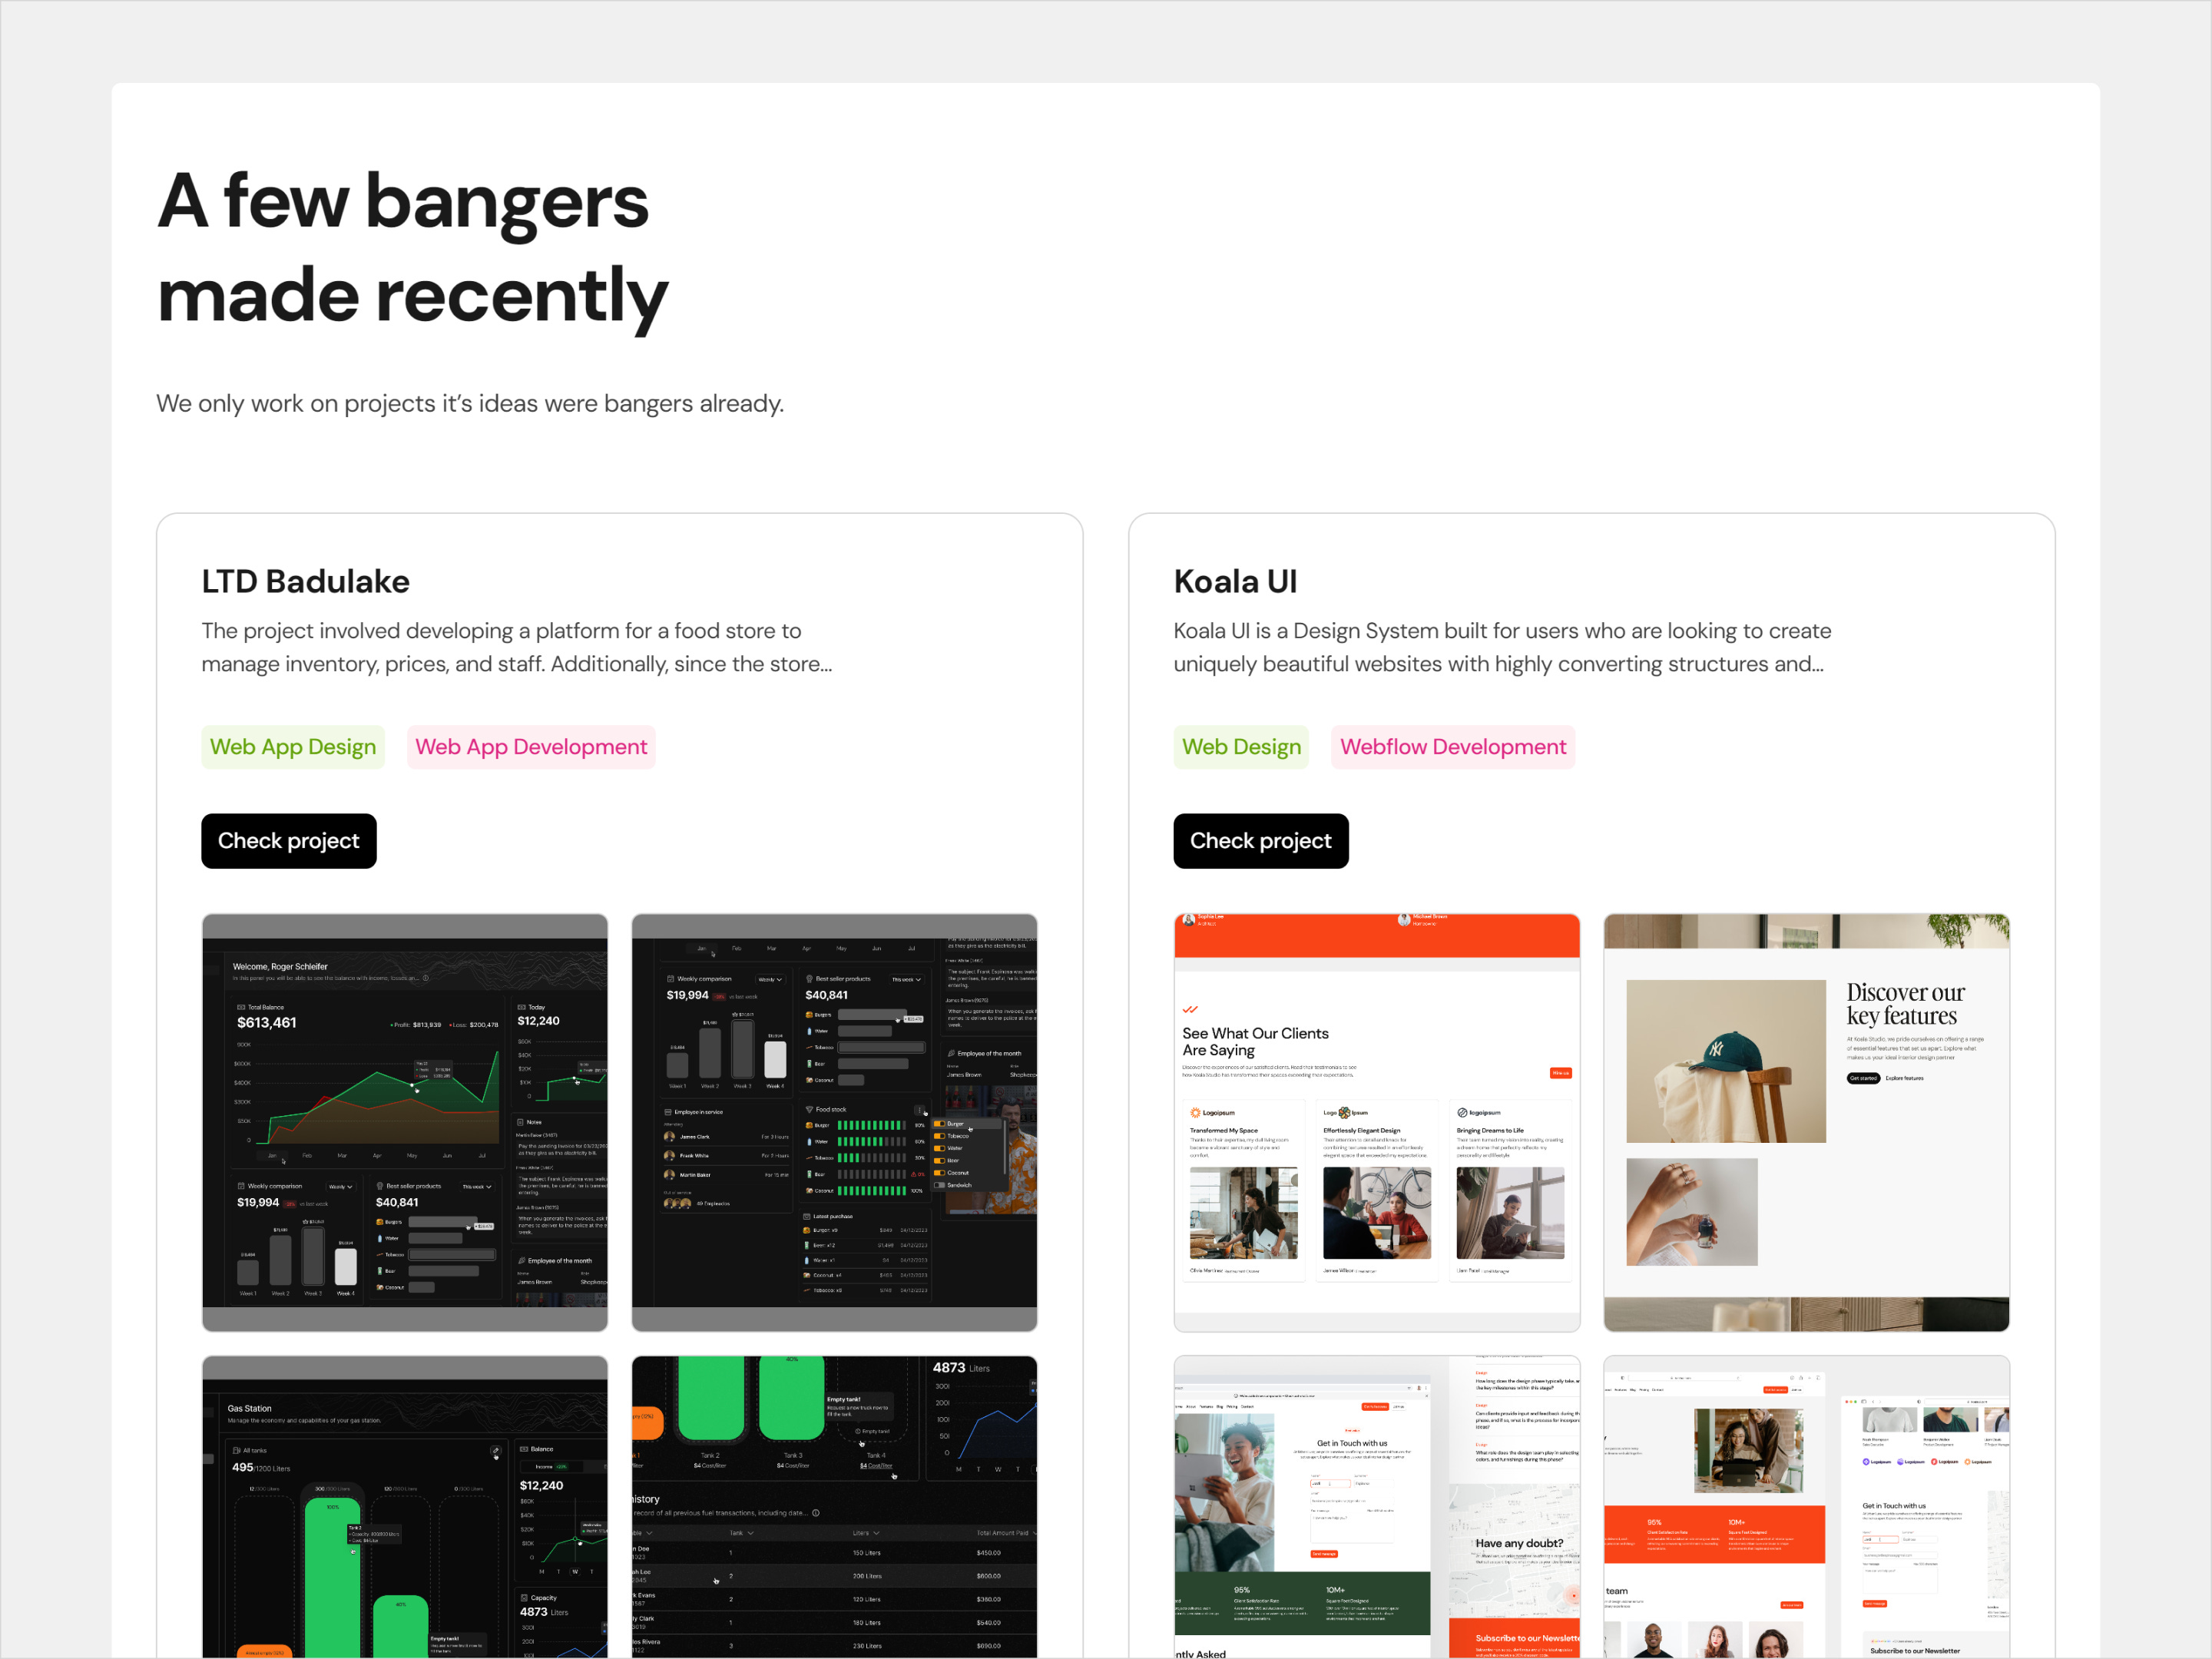
Now we move on to the work section, and this is where I usually make the most of it. I like to include all of my projects, or at least the most notable ones.
As I mentioned earlier, I don’t want to bore the client with just text, so I aim to impress them with:
Work
Text with well-researched keywords
More work
The intention with showcasing work is to try and display a product that has solved a similar problem to the one the client is facing.
In other words: If someone comes to hire me for a dashboard or SaaS project, they’ll look for more dashboard or SaaS projects in my portfolio to see how I’ve solved their problem.
And since we don’t know the exact problem: That’s why I like to include as much as possible.
But if you notice, I’m also using a 2x2 grid with another grid with more images. In the end, it’s not about creating an infinite scroll, but something relatively large, yet allowing them to see many things at once.
Process
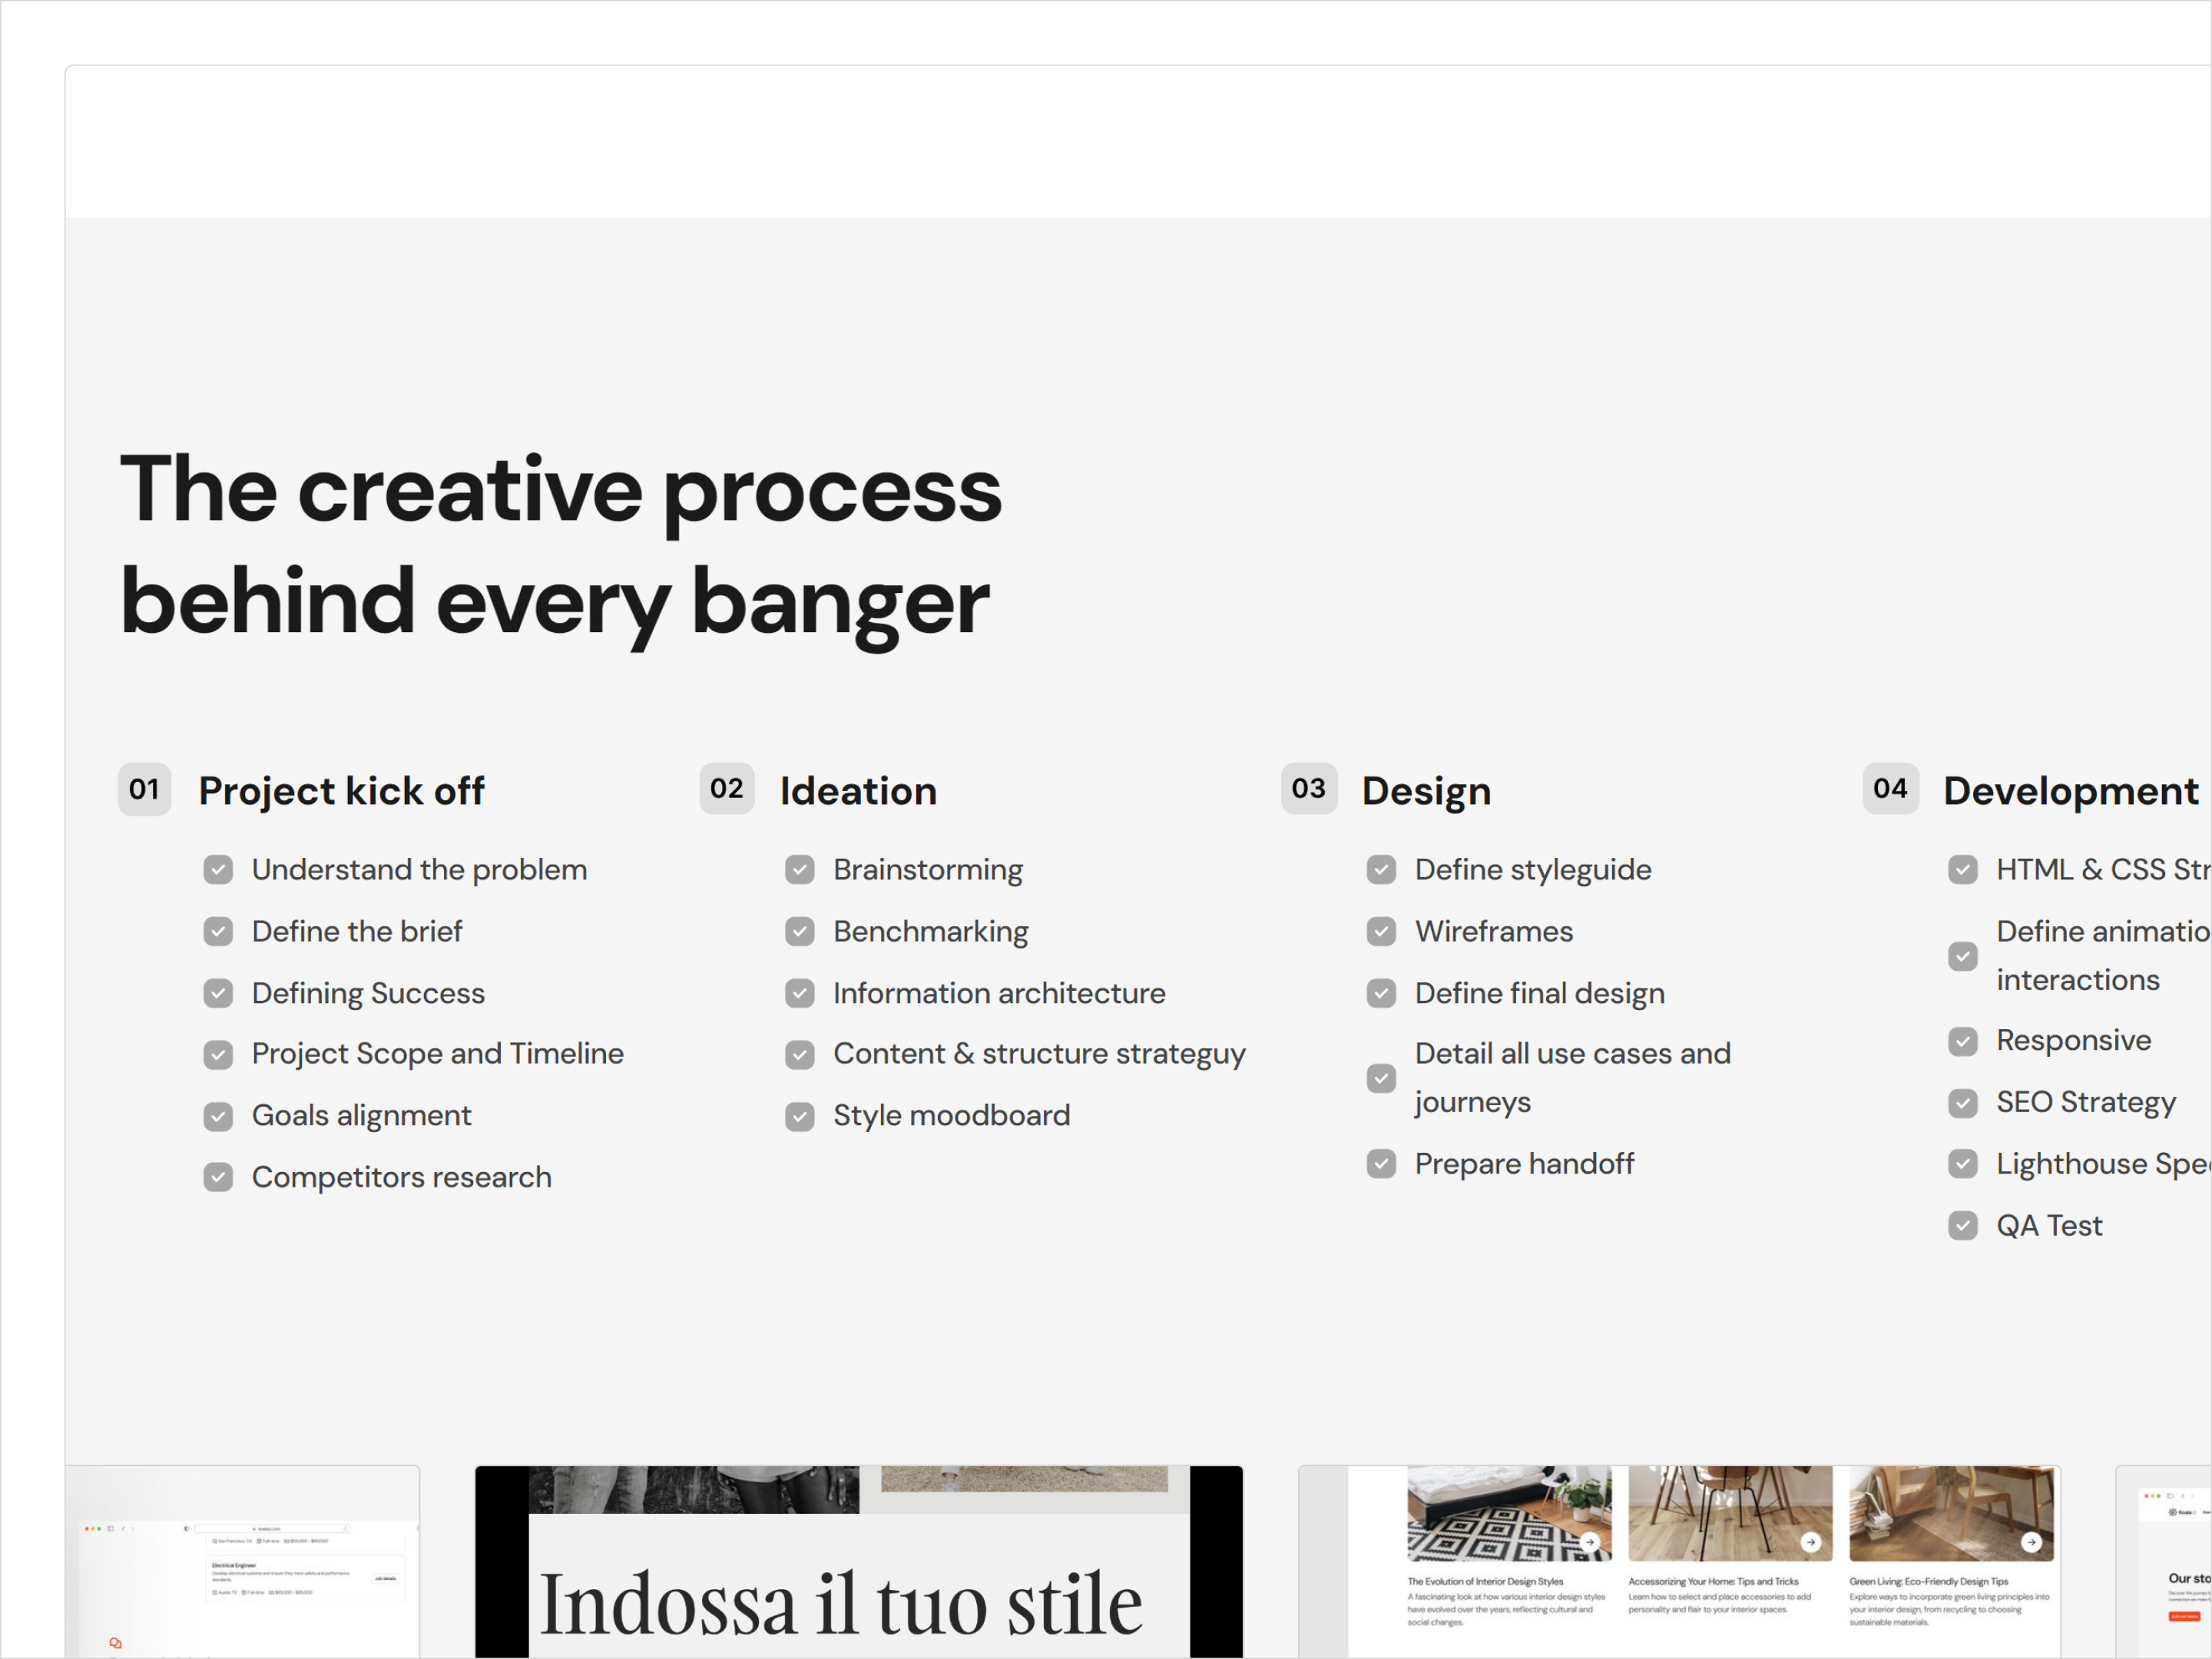
Then I like to introduce the process. I like to be super transparent with my clients and explain literally what I do from the moment they contact me.
Being transparent with the client helps break the trust barrier. Personally, I like them to see the entire process so they can see how their money and time are being used.
Manifesto/My Values

This section is perhaps the most optional of all, but I like it because it’s all about transparency with the client.
Anything I can do to be as transparent as possible with the client is better.
This way, there are no surprises.
In this section, I like to mention more aspects about who I am, how I work, what I do during the processes, and so on.
For example: My policy on meetings, agreements on payments, and more.
Pricing and Services
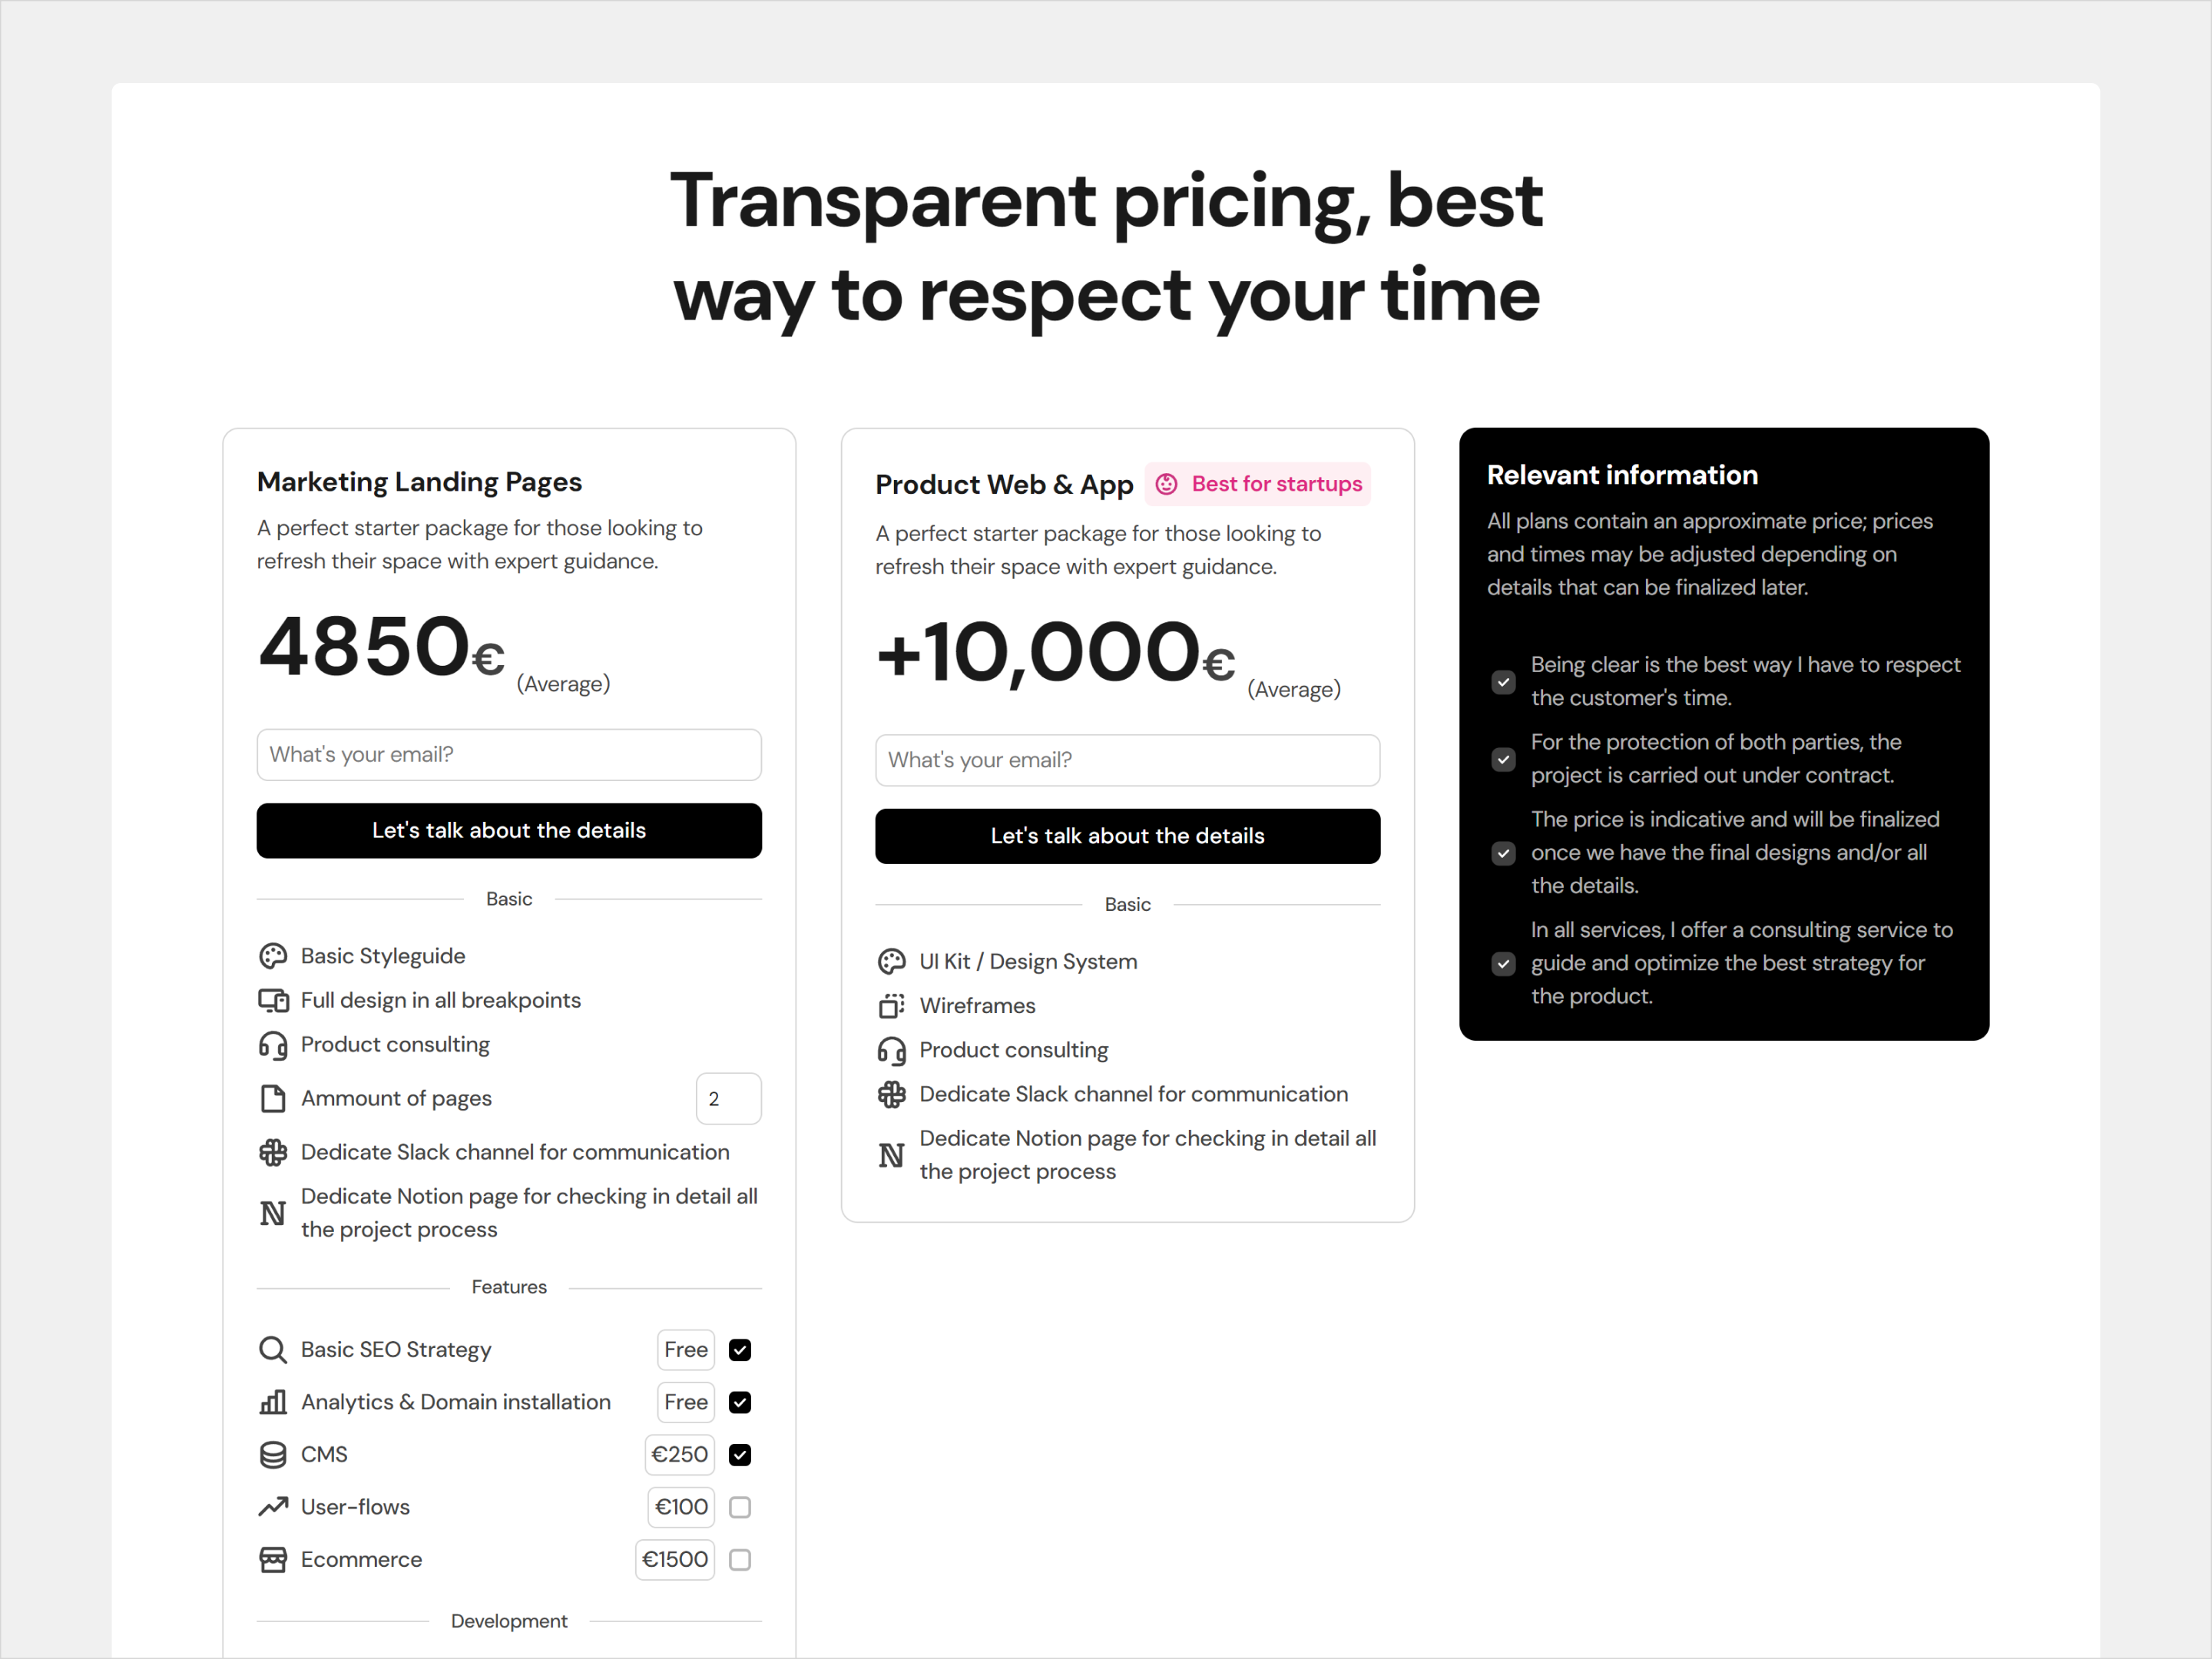
There’s one section I haven’t added, which could be quite key: The section showing your services. Simply a list and explanation of the services you offer.
It’s true, but since I have a pricing section, I can mix everything, and with the pricing, it’s clear what services I offer.
Some people don’t include pricing and instead show: The services and then contact.
Including pricing has several advantages and disadvantages:
Advantages: You’re super transparent with the client and ensure that anyone who contacts you already has a clear price in mind. There’s less room for negotiation, and if they contact you, it’s because they agree with the price.
Disadvantages: Without knowing the price, people will contact you more, and depending on your negotiation, you might close different price deals. The downside is that you’ll waste some time with people who are interested in projects for €500 as well as €4,000. Having pricing means they’ll only contact you if they agree with the price. It saves time.
Additionally, in my case, I wanted to add a calculator with all the features and services:
To show all the available services
To be even more transparent with the price.
This way, the client can calculate what they need based on the price and can play with the options to choose only what they need.
This option might be the most advanced of all, and initially, it’s better to just add a contact section and get as many emails as possible.
In this case, add a contact section and that’s it.
Another section often added before pricing is testimonials again, but right before the pricing. This way, they can see the success stories and feedback from others (because users are influenced by other users) and then the price.
In my case, I decided not to do this, but it’s quite recommended.
FAQs
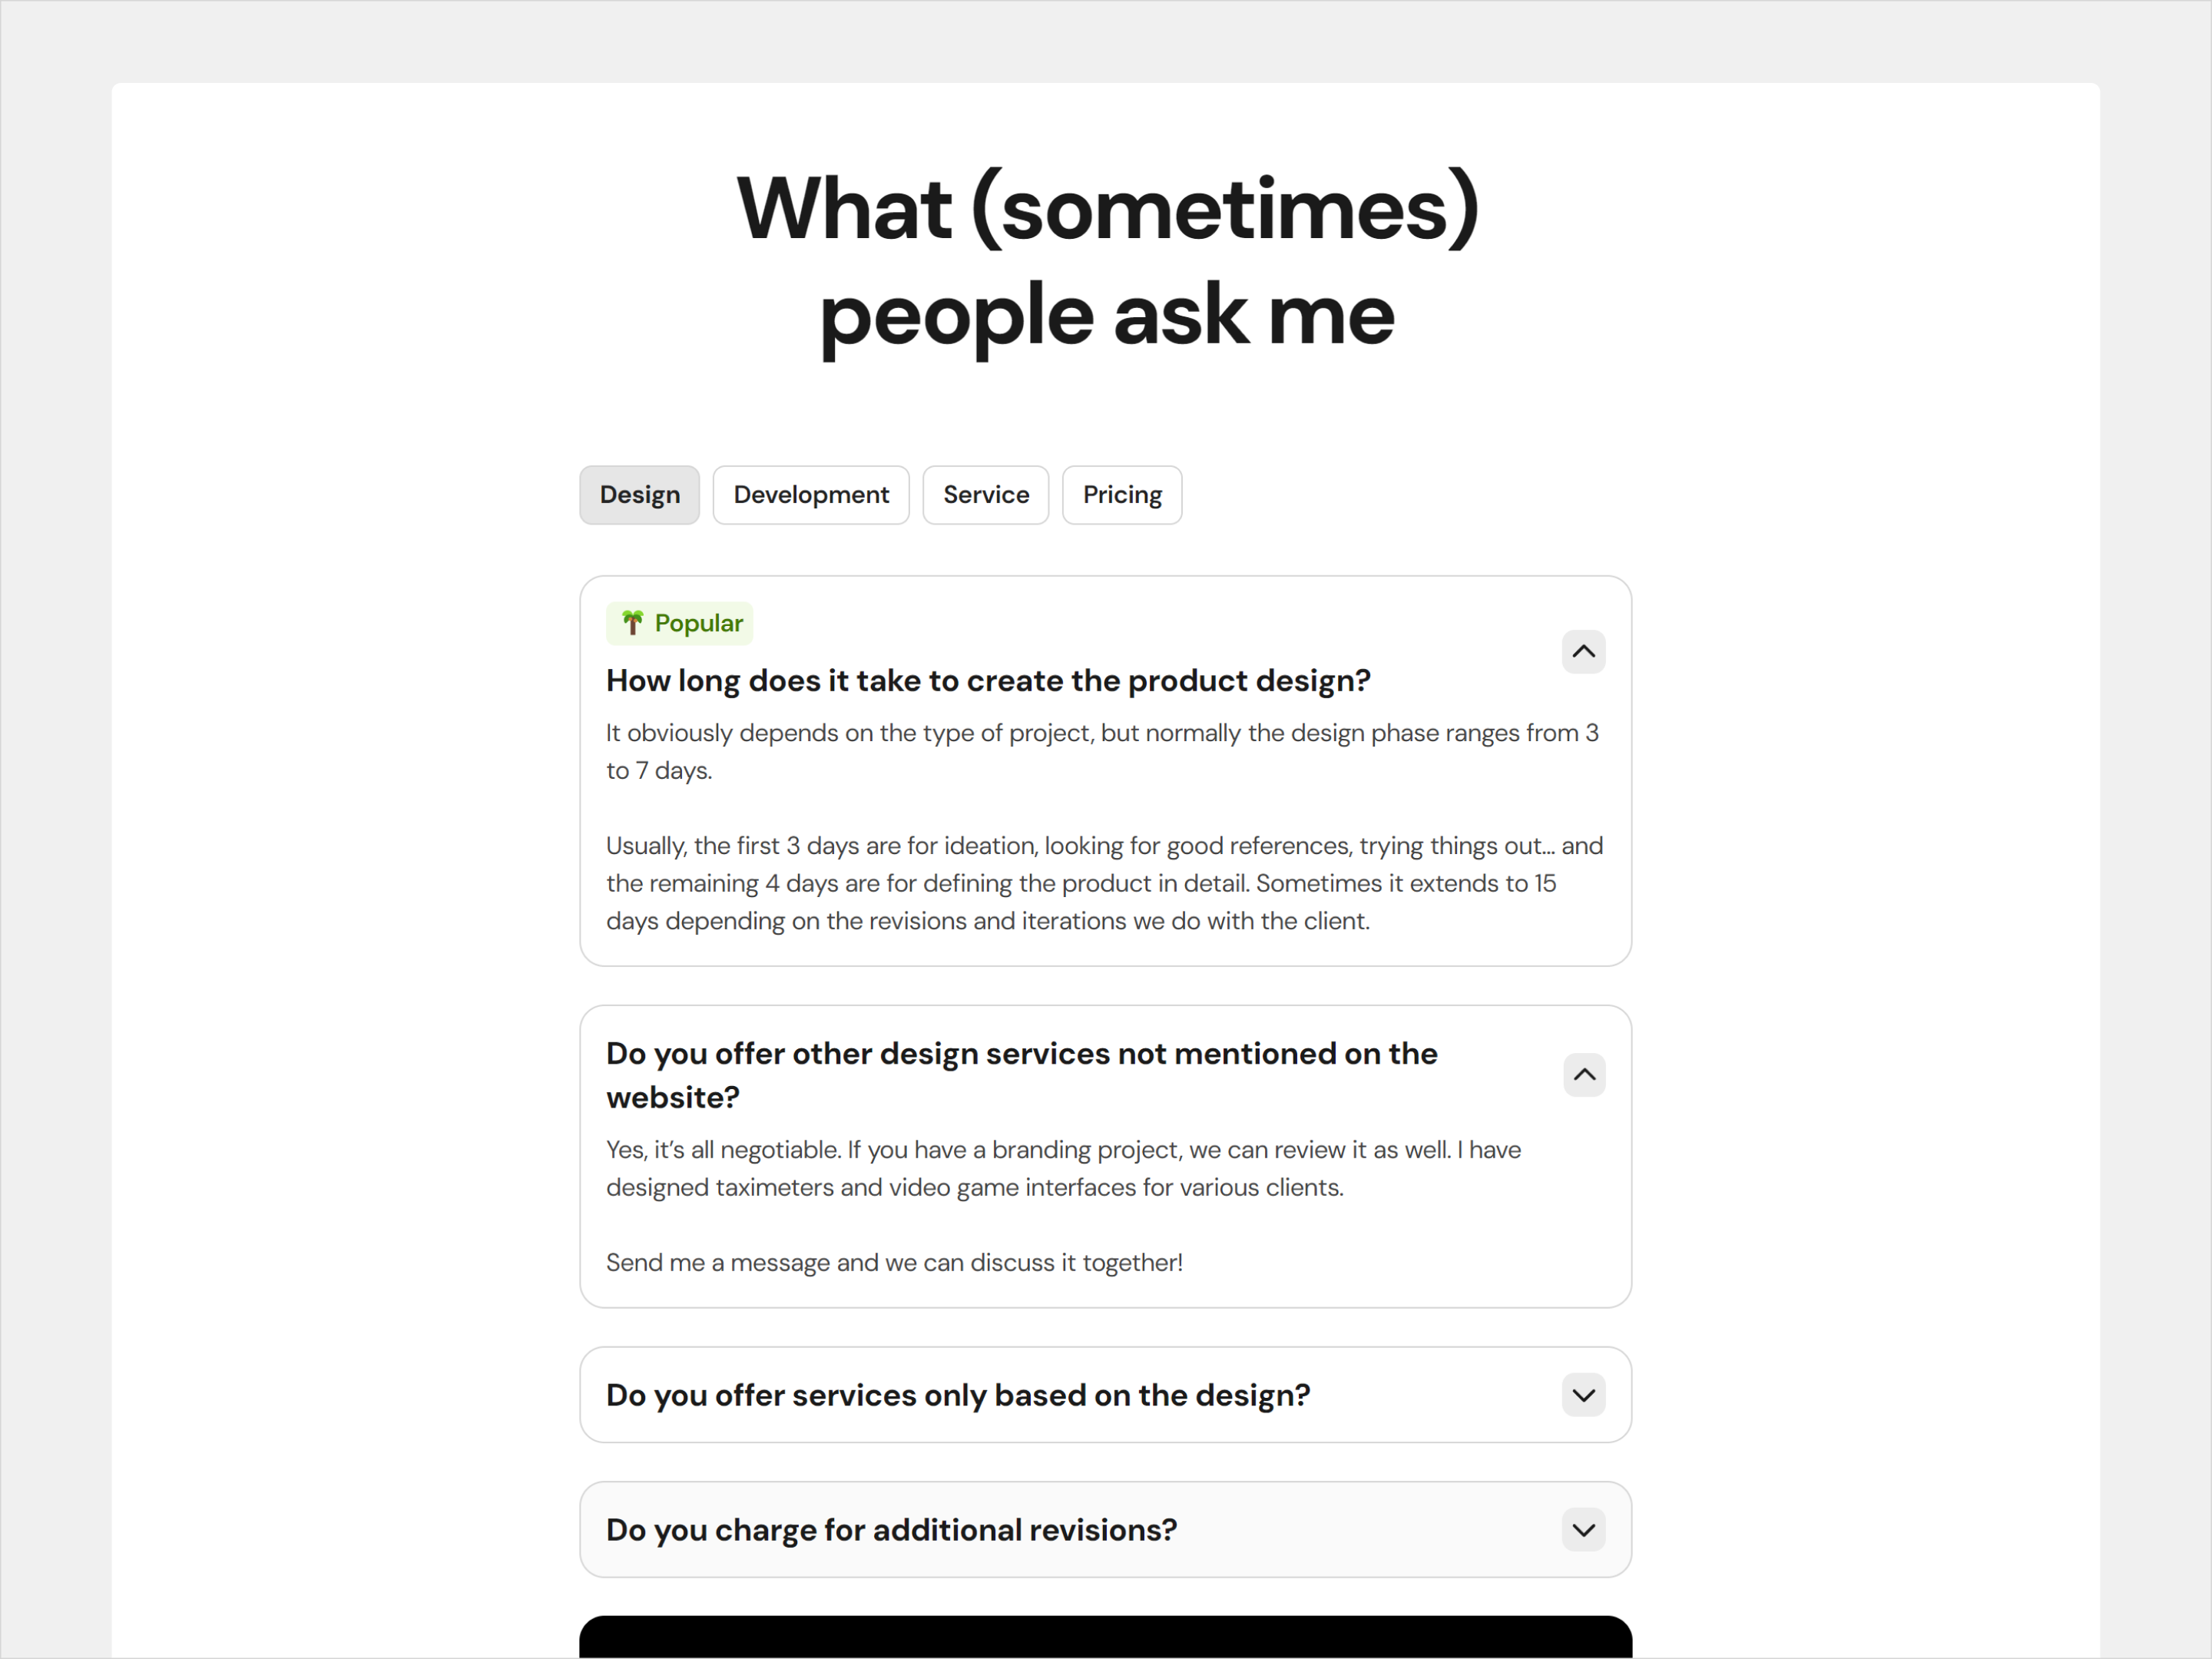
And we’re almost done. This section is quite optional if you want to trim the portfolio. I highly recommend using it for two reasons:
First: It allows the client to resolve their doubts before asking you.
Second: You can use the FAQs to place keywords that might help rank your portfolio better. In many cases, the HTML Heading 3 tag is used to indicate to Google that these are relevant titles.
About Me & CTA
And to conclude, it’s important to add the final phrase in the portfolio: This phrase usually invites collaboration or working together. The typical “Have an idea? Let’s work together.”
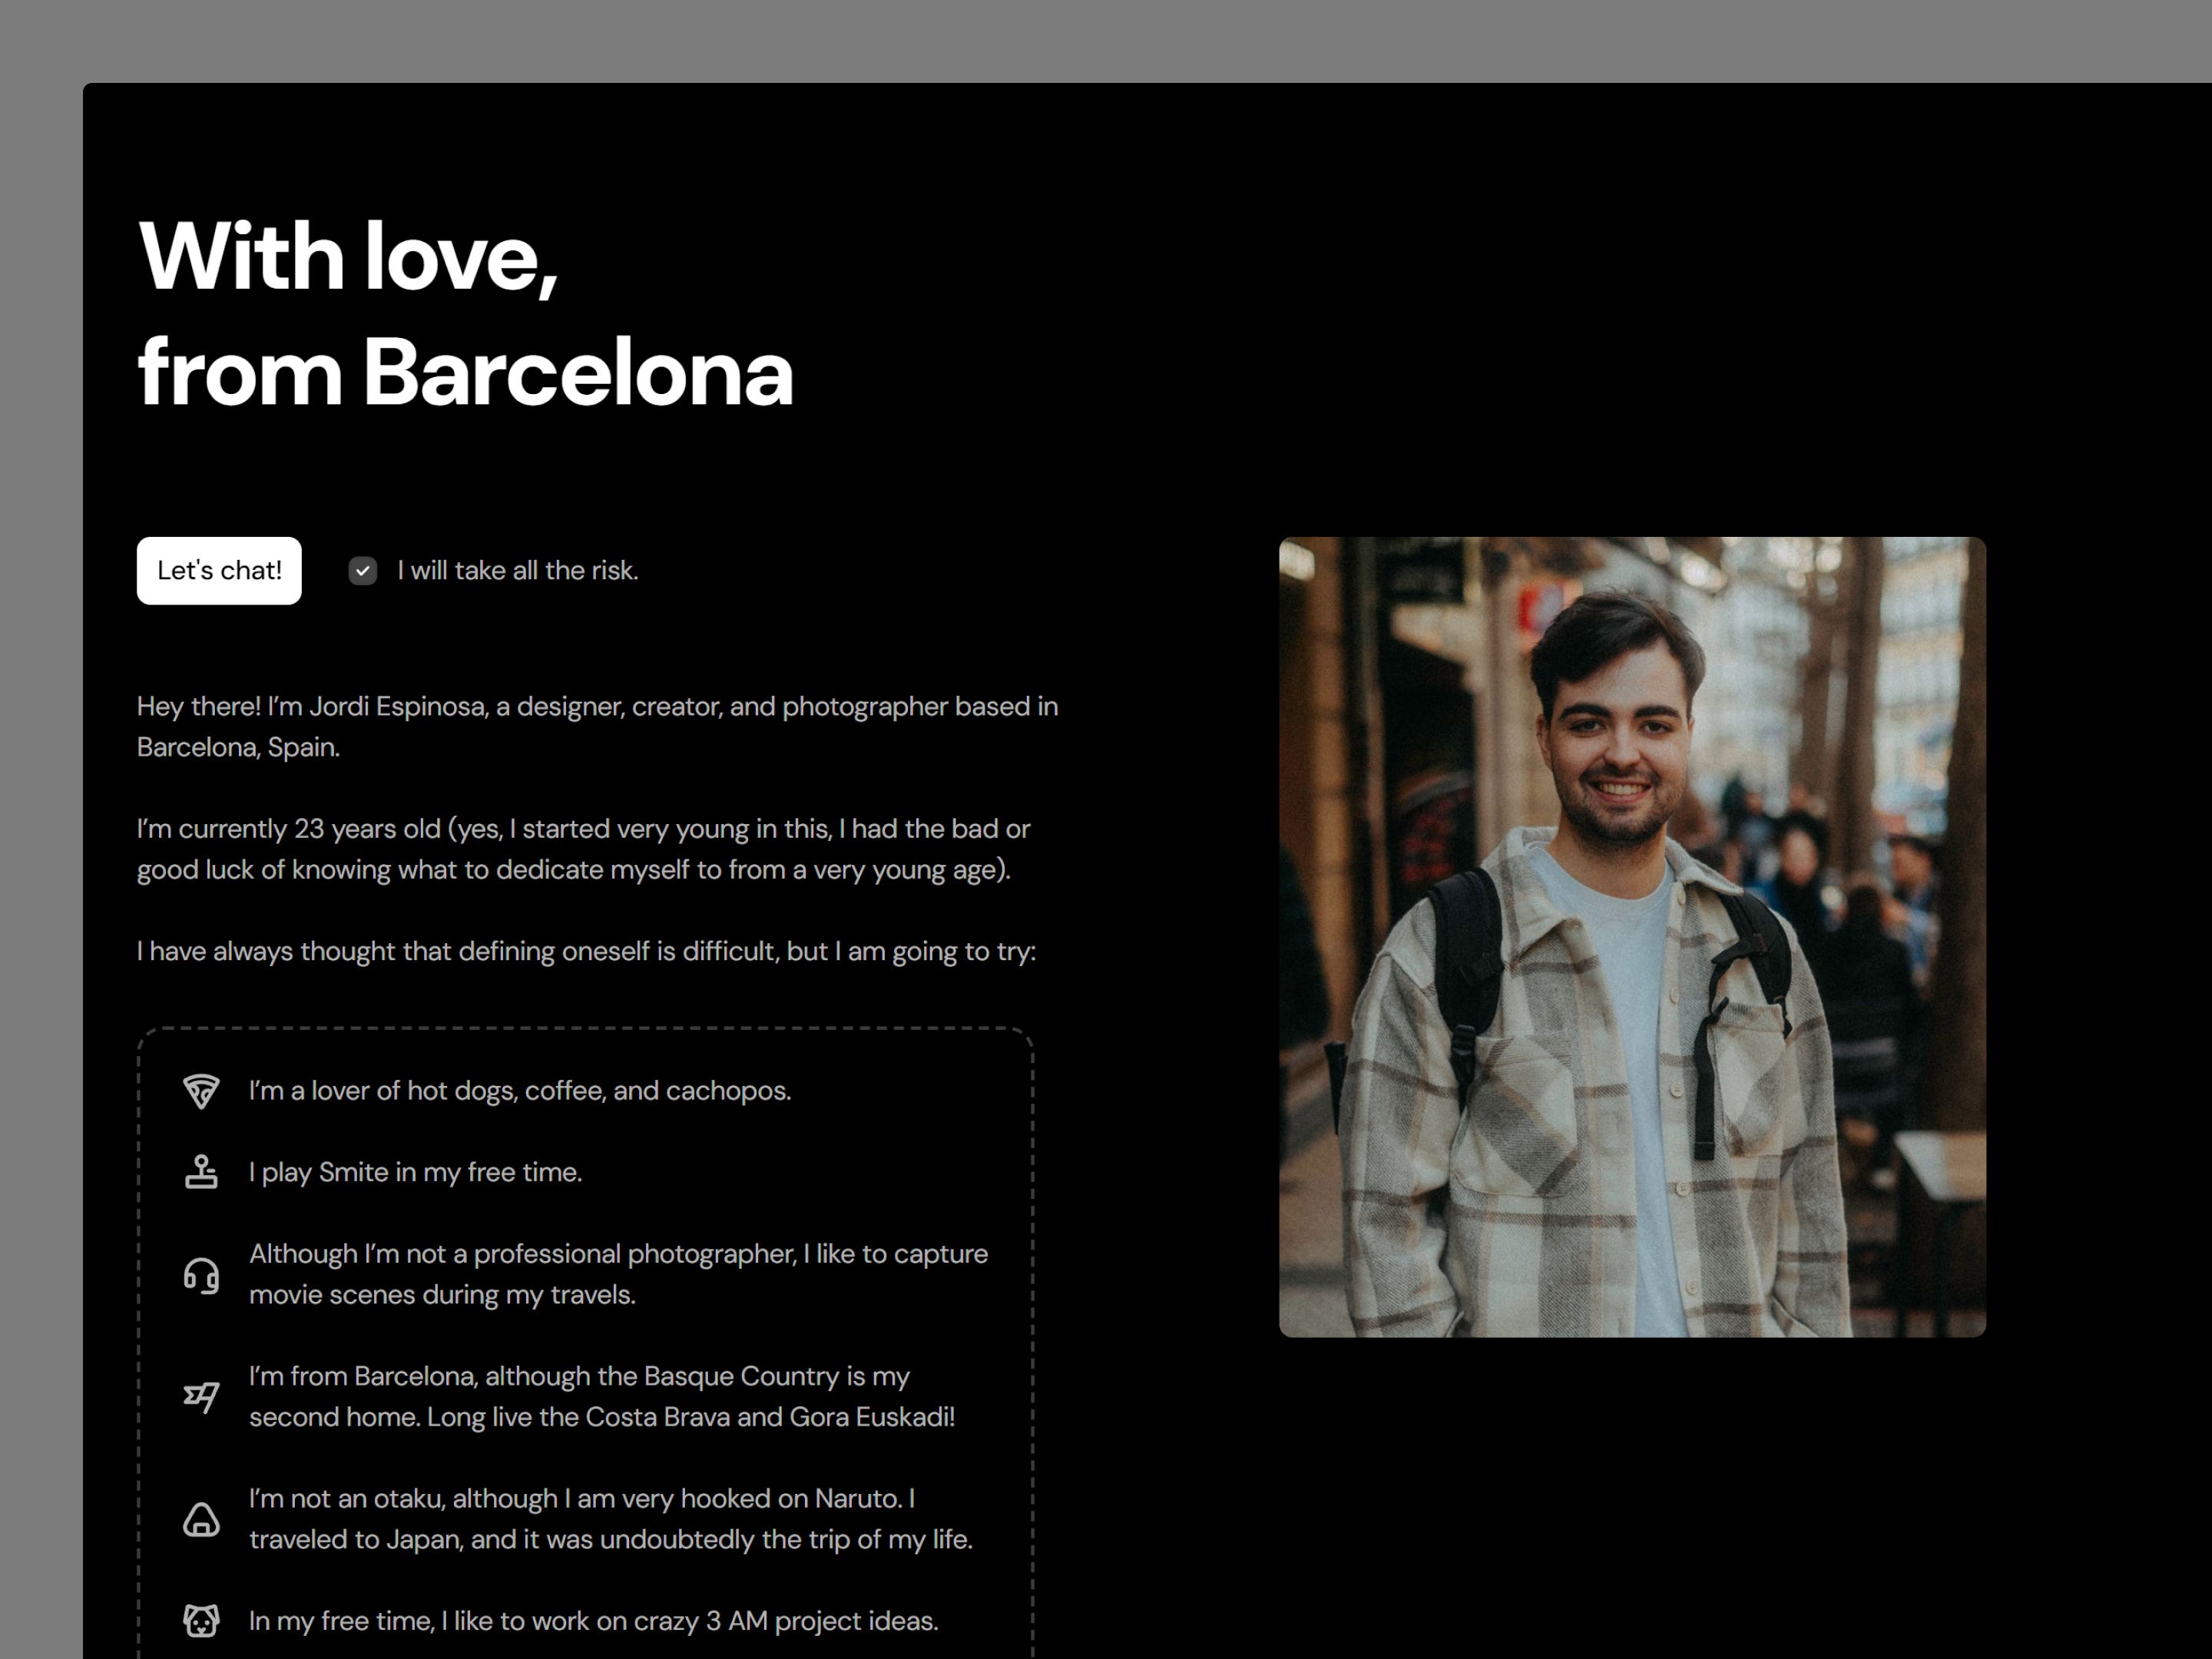
In my case, I wanted to make it a bit more personal and put a “Greetings from Barcelona” and a CTA of “let’s chat.”
Additionally, (and this is something done a lot) I wanted to blend it with a more personal touch and simply explain to the user who is behind this website.
This is done to break the trust barrier. Just like it’s said that to grow a YouTube channel or succeed as a Twitch streamer, it’s important to use the camera to build more trust: This is somewhat similar.
This is often seen on book or course websites; usually, at the end, there is information about the author.
And that’s the key structure to make your portfolio convert as much as possible. Follow a structure that converts and is well thought out.
It’s not so much about which sections you include, but that they make sense for your storytelling.
Everything we’ve discussed about being transparent and building trust: It’s important because, in the end, what’s at stake is the client’s time and money. You need to convey enough trust for them to be willing to give you their valuable and earned money.
At the slightest hint of distrust, they won’t part with their money, obviously.
3. Tools
So, how can I make my portfolio a reality?
You have several options, but the most viable are:
I’d even say that Webflow is a bit challenging for complete novices, so I’d almost recommend Framer.
Go to the Framer marketplace and find the portfolio that best follows the structure we’ve discussed and modify it with your information.
Or you can design it yourself in Figma and then hire someone to build it in Framer or Webflow. I recommend these platforms because they make it easier for you to edit the content later.
4. Domain
And to finish off the website, you’ll need a domain: I recommend using GoDaddy and choosing from there.
To choose a domain, don’t overthink it. Try to find your name + surname and an ending with .com, .me, .design, or whatever you like.
Then you can integrate it quite easily with the tool you’re using to develop your website.
5. Projects and Content


Okay, one of the questions that might arise when perfecting your portfolio is: What type of content should I upload?
First, you need to try to be as niche as possible. That is, if you’ve done a thousand types of projects, try to upload only those that are related. If you do logos and websites, try to choose one or the other. It’s not a problem to upload everything you do, but the more specialized, the better.
Basically, this will help you focus the content of the website with a more specific language. You’ll be able to talk specifically about websites, not a bit of everything.
I recommend uploading only the projects you’d like to be hired for. Don’t upload anything just to impress people.
Now, it’s very important to upload high-quality projects without using "lorem ipsum" or placeholder content. Make everything as realistic as possible.
This is super, super important: I know it takes more time to create realistic content, but it’s worth it a thousand times over. It looks infinitely more professional.
And now, you have two options:
If you’re lucky enough to have clients: Upload the projects with your clients.
If you don’t have clients yet and are using this portfolio to get them, then create them yourself. Some of the projects on my website are fake, and you might not even realize. What’s important is to upload content; people don’t care if it’s fake; they want to see your skills in action.
Key Aspects to Consider
So, what has really made me earn so much money? In other words, how do I achieve such a high closure ratio?
An effective portfolio is based on simplicity: It makes it easy for potential clients to quickly understand your services and skills.
Contact should be simple and quick: Minimize barriers for clients to reach out to you, increasing the chances of getting projects.
Focus on the essentials: Show your best work and relevant skills without overwhelming the visitor with unnecessary information.
Clarity in the value proposition: Clearly communicate what you offer and why you’re the best option, making the client’s decision easier.
Optimize for conversions: Every element of the portfolio should guide the visitor towards contacting or hiring your services.
And most importantly, do what works without reinventing the wheel.
If you liked this article, I recommend checking out our latest article on 7 viable project ideas that can help you earn an extra €500 per month.
Until next time,
Jordi Espinosa.
✨ This Week’s Sponsor · Branding Website
Get access to over 150 examples of branding used in products and web pages, color palettes, typography, and more resources.
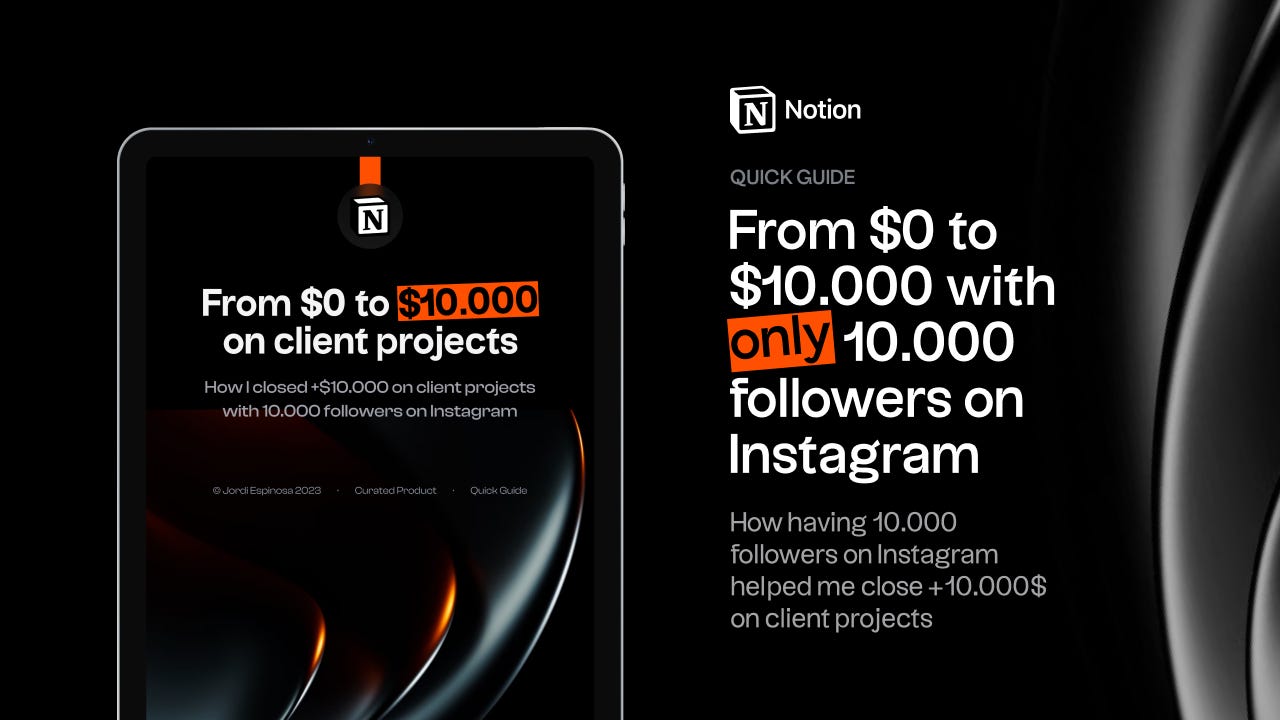
If you are interested on making a living with Content Creation, I’m thrilled to announce that I’ve recently release my book: From $0 to $10.000 on client projects with only 10.000 followers on Instagram”.
🔖 The Bunker Bookmarks
🖊️ My portfolio
📕 The Ultimate Guide to Choose the Right Typeface · Workbook
🧠 Second Brain for Creatives · Free Download
📕 Typography is for everbody™ · Free Download
💖 Favorite icon pack.
🎨 Favorite Color Generator.
🤹🏻 My Equipment
✱· Most Productive Designer Mouse
✱· Office chair
✱· Sony A7IV